3D Prints, Modular Fiddle
How to Make a Truly Durable Violin
Dec
This blog post will walk you through how to print, process, and prep Modular Fiddle parts to build the ultimate go anywhere, do anything 3D printed durable violin.
Before you do anything, you should know that this is hard. Printing the body with scaffolding well enough is hard. Keeping the neck straight during and immediately after annealing is hard. It will take several attempts. I want you to go for it, but please be prepared to throw out several failed bodies and necks. Get extra filament.
You can reduce the risk and buy a kit of annealed printed parts. I have already gone through the pain of piles of failed prints and annealed parts that come out looking like potato chips. Use my expertise!
You may also purchase a fully annealed Modular Fiddle.
This one is built and ready to ship! You may also purchase the kits and the assembly labor and I will build a fiddle to your specs and ship it to you.
A bit of History…
I first started trying to anneal parts in summer of 2019. It is now December 2021. In 2019 I got it sort of good enough, and you can read about my process and results on this Proto-Pasta blog post.
Then, I promised a high-temp fiddle to my fiddle icon, Kevin Burke, in February 2020, after having him sample a Modular Fiddle at a book signing in Portland. It went something like this.
“Can I make you a fiddle?” I asked, and immediately followed anxiously with “I can make a special durable violin that can withstand very high temperatures.”
“That sounds wonderful!” replies Kevin.
“Oh, I should note, sometimes the neck comes out a little crooked and the body can be wonky.”
“That might be a little hard to play, don’t you think?”
Thus began the epic quest of making one good enough for Kevin Burke. Spoiler, here it is!
Why Anneal?
A standard PLA or carbon fiber PLA Modular Fiddle sounds great, performs well, and can last many years. It cannot, however, get hot. Like really and truly it CANNOT get hot. If you leave it in the sun on a 70F day, it could fail completely within 5-10 minutes.
You could use different materials, like ASA, ABS, PET, or Nylon, but you will sacrifice something (usually the sound).
The solution is to anneal a high temperature PLA. If annealed properly, a high temp fiddle can sit in a hot car parked in the sun on a 100F day and be just fine.
The Basics of High Temperature PLA
In order to get PLA to perform at high temperatures, you must allow the material to shift on the molecular level from an amorphous structure to a semi-crystalline structure. The process that allows this shift is called annealing.
After printing, the plastic is in an amorphous state. To anneal it, you must heat the part above the glass transition temperature, which is about 70C for PLA. Then, the material is able to reconfigure itself into a crystalline or semi-crystalline state.
Once the material transitions to semi-crystalline, then the part may be cooled. Until the part is cooled below the glass transition temperature, it may be very flexible and if squished or otherwise deformed that deformation is permanent.
This whole process results in some dimensional changes to the part. How much and where depends on the part geometry and print settings, but mostly on the material. You must scale the part in your slicer to account for this effect.
That’s the basics, but there is a lot more to learn if you’re interested. Here is some info from Proto Pasta about their HTPLA.
Get the Right Files
You can use all of the standard Modular Fiddle files for the neck, tailpiece, pegbox, and bridge. Download the latest print files and design package here. Consider buying a kit of the off-the-shelf parts for your build.
For the body, you need to purchase this special print file. This file is a V2-R9 body with scaffolding. This scaffolding is what holds the plates of the body in shape during the annealing process.
Order the Right Materials
I’m only going to recommend Proto Pasta materials here, because that is what I have used. Another type of material may work, though, so please feel free to experiment.
If you plan to anneal, you will have to scale by the values given by the material manufacturer (or my values, below).
For the tailpiece, saddle, and pegbox, you may use any HTPLA from Proto Pasta. HTPLA requires scaling by 102% in x and y, and 99% in z. Oh, you should know that a translucent material will go cloudy after annealing. So perhaps stick with opaque materials.
For the body and neck, use Carbon Fiber HTPLA in any color as long as it’s grey or black. Make sure you get HTPLA, and not the Original Carbon Fiber PLA. HTPLA-CF requires scaling by 100.6% in x and y and 99% in z.
Consider purchasing an infrared thermometer that lets you check the temp of things from a few feet away. I still use mine every time.
Start With the Easy Parts
Print the tailpiece, saddle, and pegbox as described by the print settings blog but scale them appropriately in your slicer.
When the prints are done, you must keep the parts stuck to the build plate very firmly! If you need to keep your build plate hot, do that. They must stick. If they come unstuck, find a way to stick them back down if you can.
Make sure that your build plate is OK sitting in a 300F oven. I use glass with hairspray and it works great.
To anneal these parts, move the oven rack to the center position and heat your oven to 300F. Once the oven is hot, turn it off completely. Then insert your parts still stuck to the build plate. Allow to heat for about 10 minutes. Then remove the parts (if you have an IR thermometer check to see that they are over 70C) and let cool at room temperature.
Great, you’re done! Wasn’t that easy! And now you have some high temp little parts. You can use them on a regular neck and body. No need to anneal the neck or body, no! Just stop now, really!
Next Level: the Neck
Now that you got your feet wet with the little bits, let’s tackle the neck. The neck is hard, because it will want to warp on you and there is not much you can do about it. This is why HTPLA-CF is recommended over standard HTPLA. It warps much less due to the stability and stiffness of the carbon.
Scale the part appropriately in your slicer and print with a wide brim. You need this to stick down more than anything you have every printed in your life. Print with the recommended print settings.
Once printed, leave it on the build plate.
Heat your oven to 300F with the rack centered. Once hot, turn off the oven and insert your part. Let heat for 20 minutes.
Now things get interesting. Pull out your part. How does it look? If it has not warped and lifted at the ends, that’s awesome (it still might though so keep an eye on it while it cools). But let’s be real, it probably has at least a little.
Here is what you need to do, but this is tricky and took me some practice…
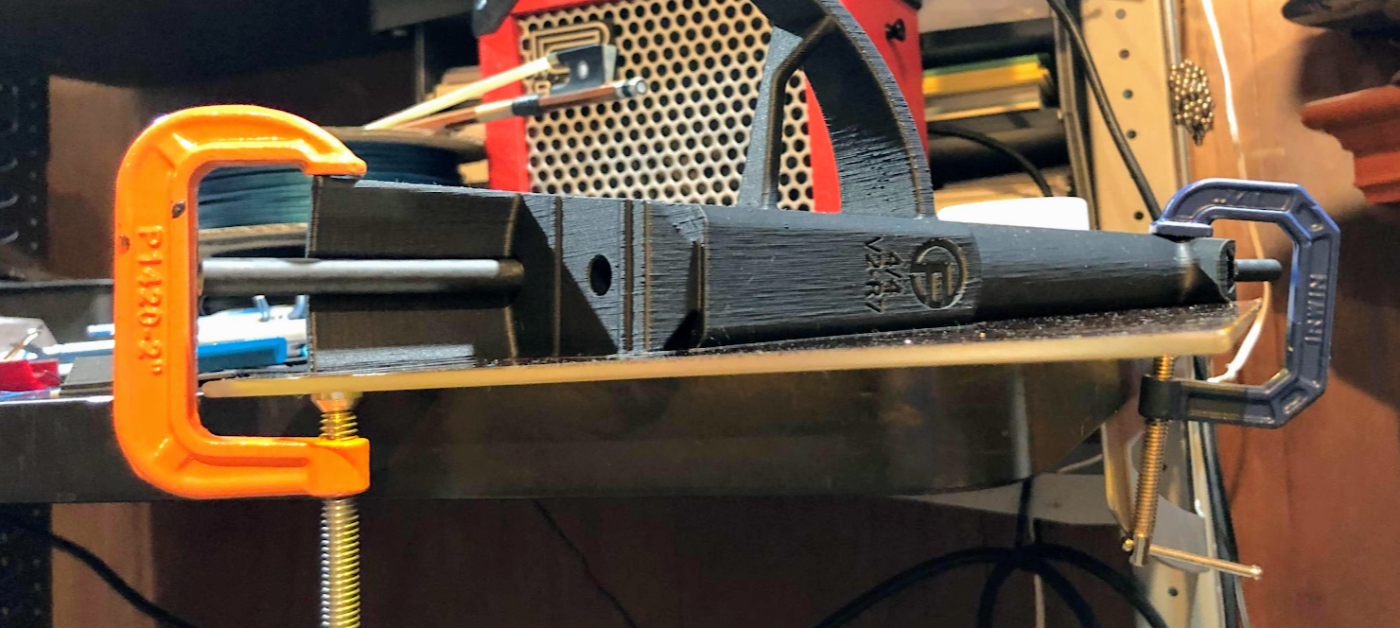
Allow the neck to cool somewhat. You want it to get to where it is as hot as possible but you can’t easily deform it by hand. Now clamp the ends of the neck down to a table or something, maybe even just your build plate. Start gently, and make sure the clamps are not deforming the part where they contact! Tighten them a bit until the neck is flat to the build plate, and allow the part to cool completely.
With any luck you have a straight and usable neck. But odds are good that it is a little wonky. Consider using it anyway, as you can always replace it later. But if you are making a fiddle fit for Kevin Burke, you might need to try a half dozen times like I did.
Boss Fight: the Body
You have a taste of the challenge of annealing. You have had some success. You perhaps have some scars from your battle with the neck. Now you are ready.
The key to a successfully annealed body is proper timing during the anneal process. Consider purchasing an infrared thermometer if you don’t have one, it will help with the timing.
First, you need to print the model of the body with scaffolding you purchased from my shop. Bring it into your slicer. You DO NOT need to scale it! Slice the model with the standard recommended print settings.
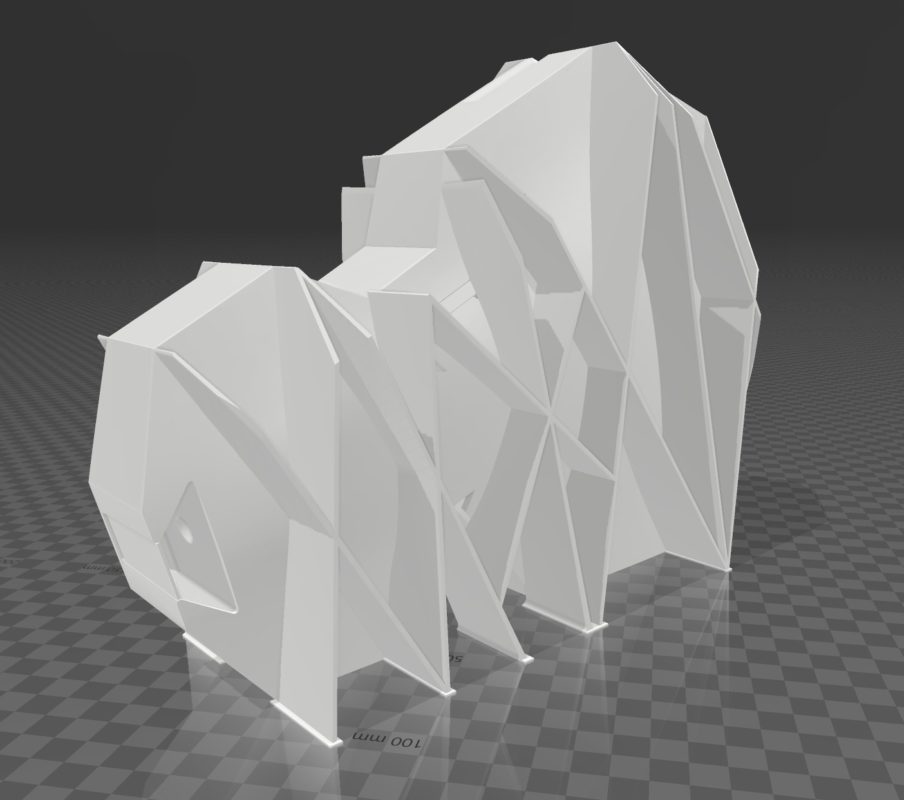
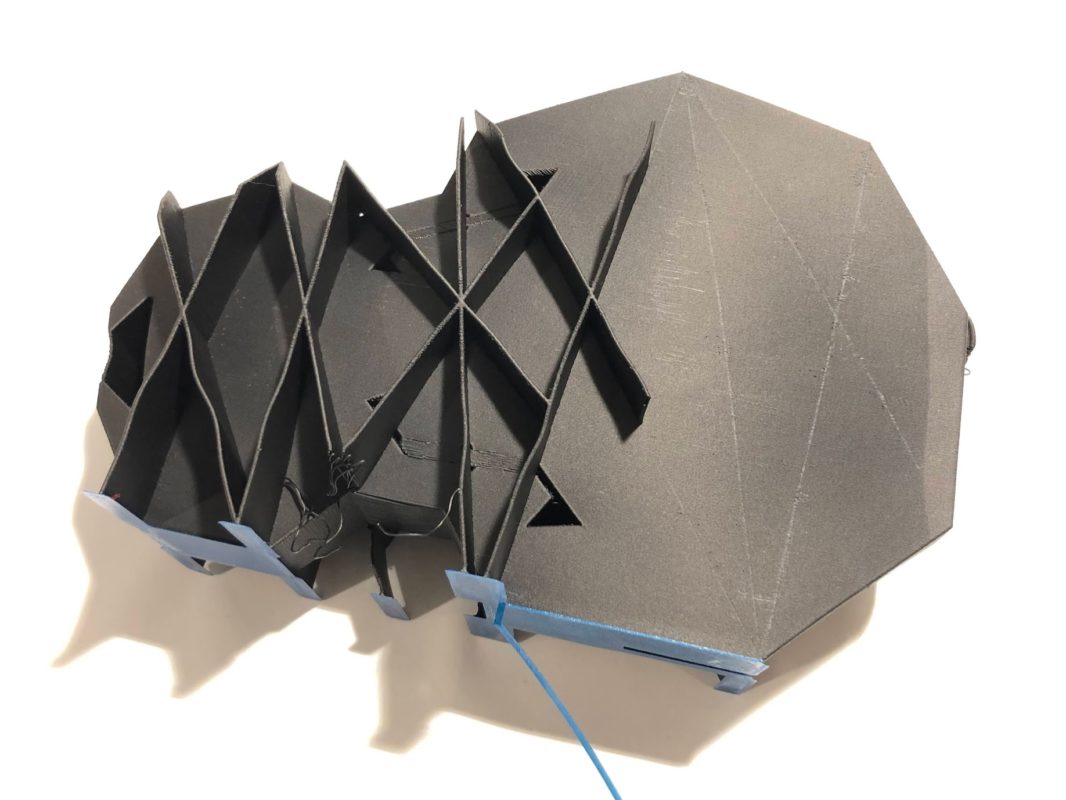
Let’s talk about this scaffolding. The ribs that make the scaffolding are a separate part from the body. They do not intersect, but they do touch the body. They are intended to be printed such that they easily break away after you are done. However, this depends on your slicer settings.
You want your slicer to not merge the bodies/surfaces into one. Some slicers have a setting you can change. In Simplify3D, the default setting is correct for this print. Take a look:
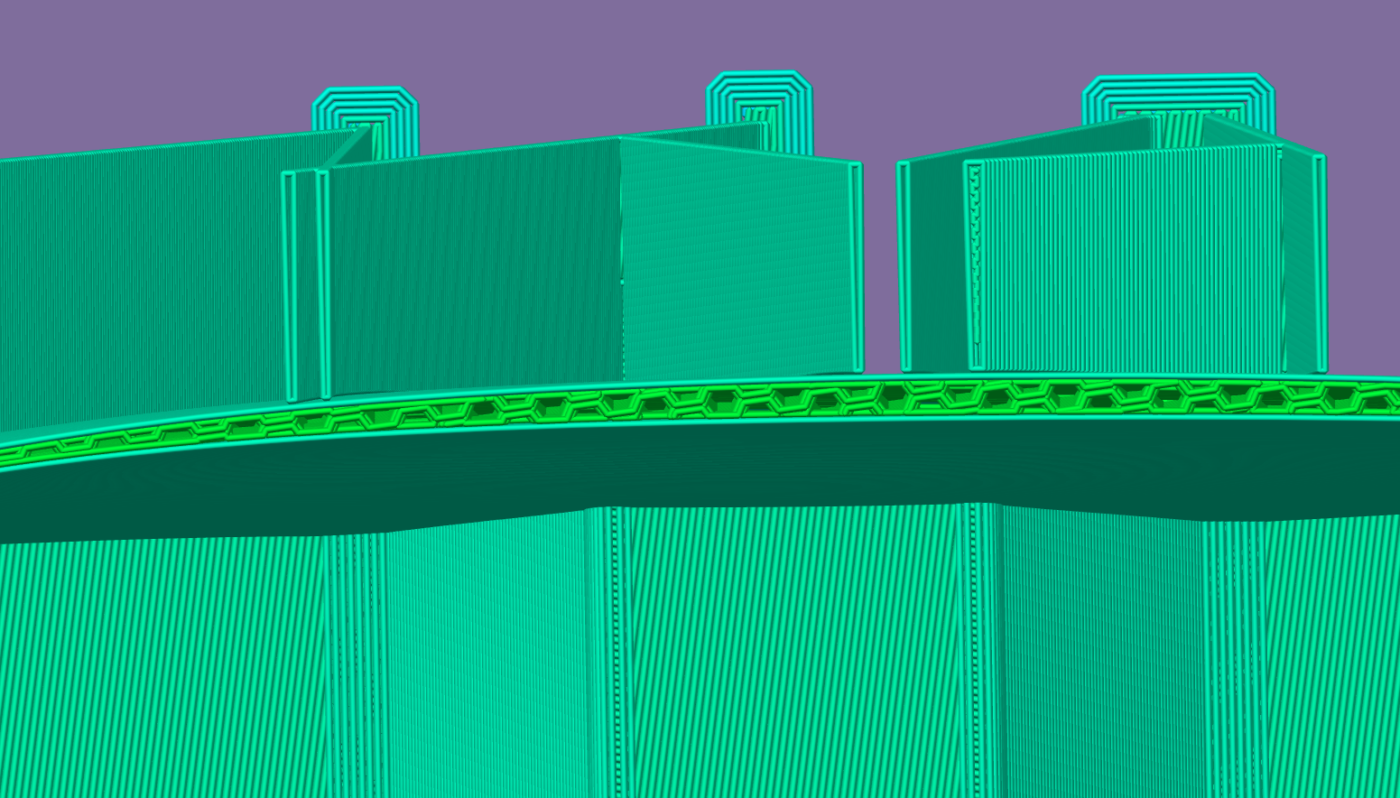
In the image above, you can see that the rib perimeters are separate from the body perimeters. Great. This is correct. If yours connects the perimeters, then the ribs will be much more stuck to the body. If you cannot change this, you can still make the part, but you will have more labor to clean it up when you’re done.
Now print it.
I almost always lose a scaffold piece and end up with some droopy bits. Usually it works out OK in the end.
OK get ready. The final battle is here. You need to anneal the scaffolding first, and then the body. Here’s how to do that.
Preheat to 300F, oven rack in middle position, or maybe a bit lower to allow the taller print to fit.
Leave the body bonded to the build plate.
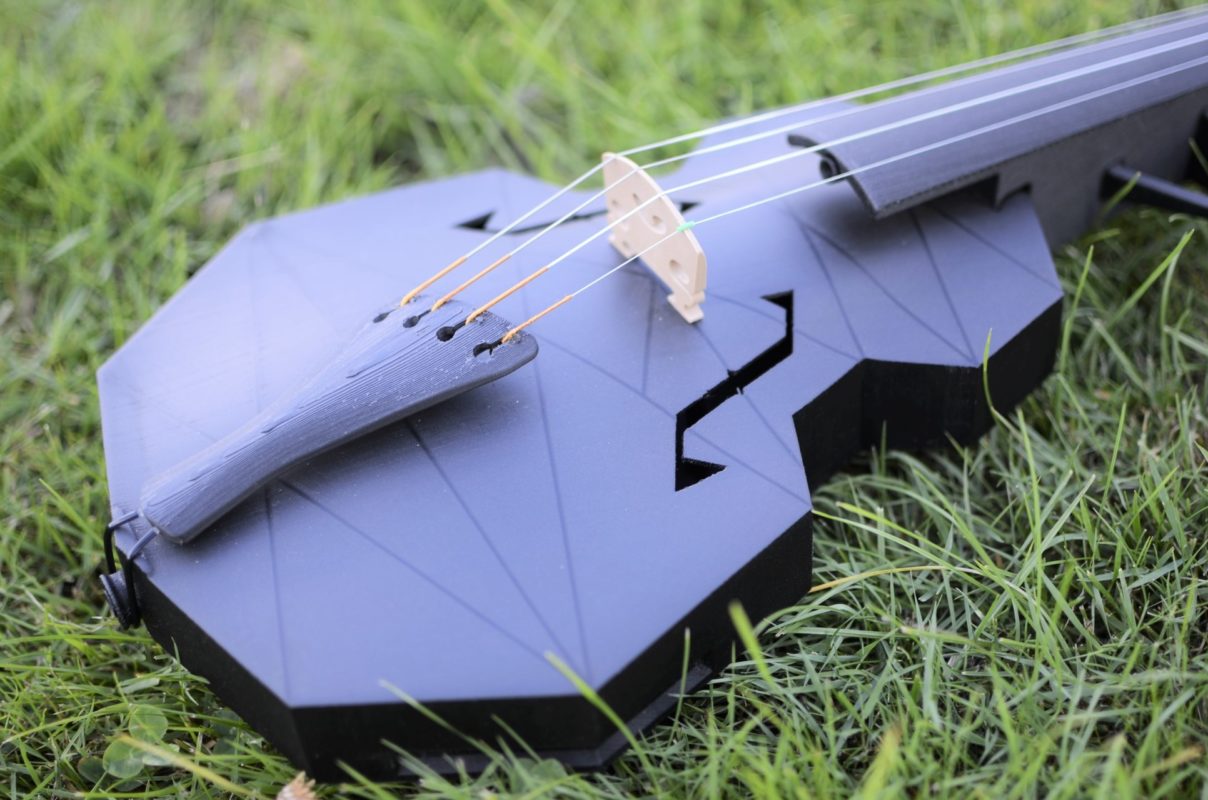
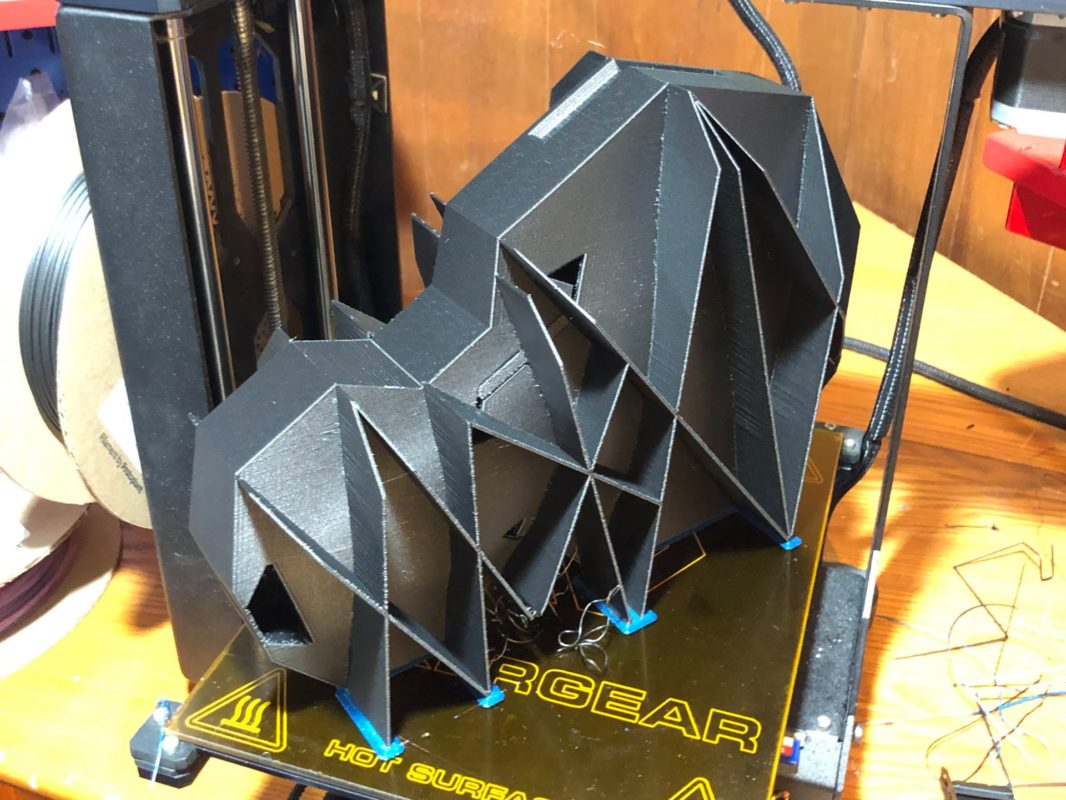
Turn off the oven and insert the print. Heat for 3-5 minutes. Remove. Check the temperature of the ribs. Above 70C? great. No thermometer? They should now be wavy, like in the image, below. Turn the oven back on to 300. Set the body aside and let cool until ribs are firm and down to 50C or so.
Once the ribs have cooled and firmed up, turn off the oven again and insert the body. Let heat for 15 minutes. Remove. Check the temperature of the body in a few spots to make sure it has heated sufficiently. Set aside and let cool completely at room temperature.
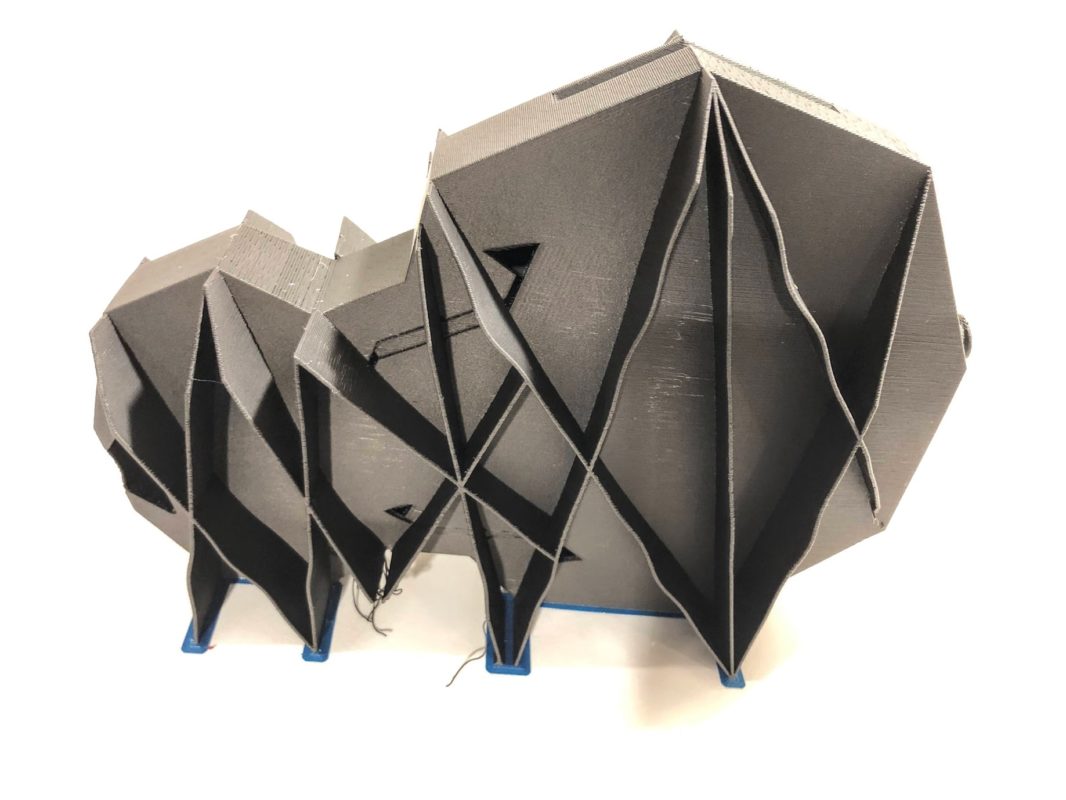
Once cool, you can remove the scaffolding using pliers as needed. I was able to easily break off the scaffolding on this body by hand.
Please wear eye protection when you remove the scaffolding. It can fly pretty fast and has sharp edges. Also wear a a proper shop mask when you file or sand carbon fiber PLA. Do not inhale carbon fiber PLA dust.
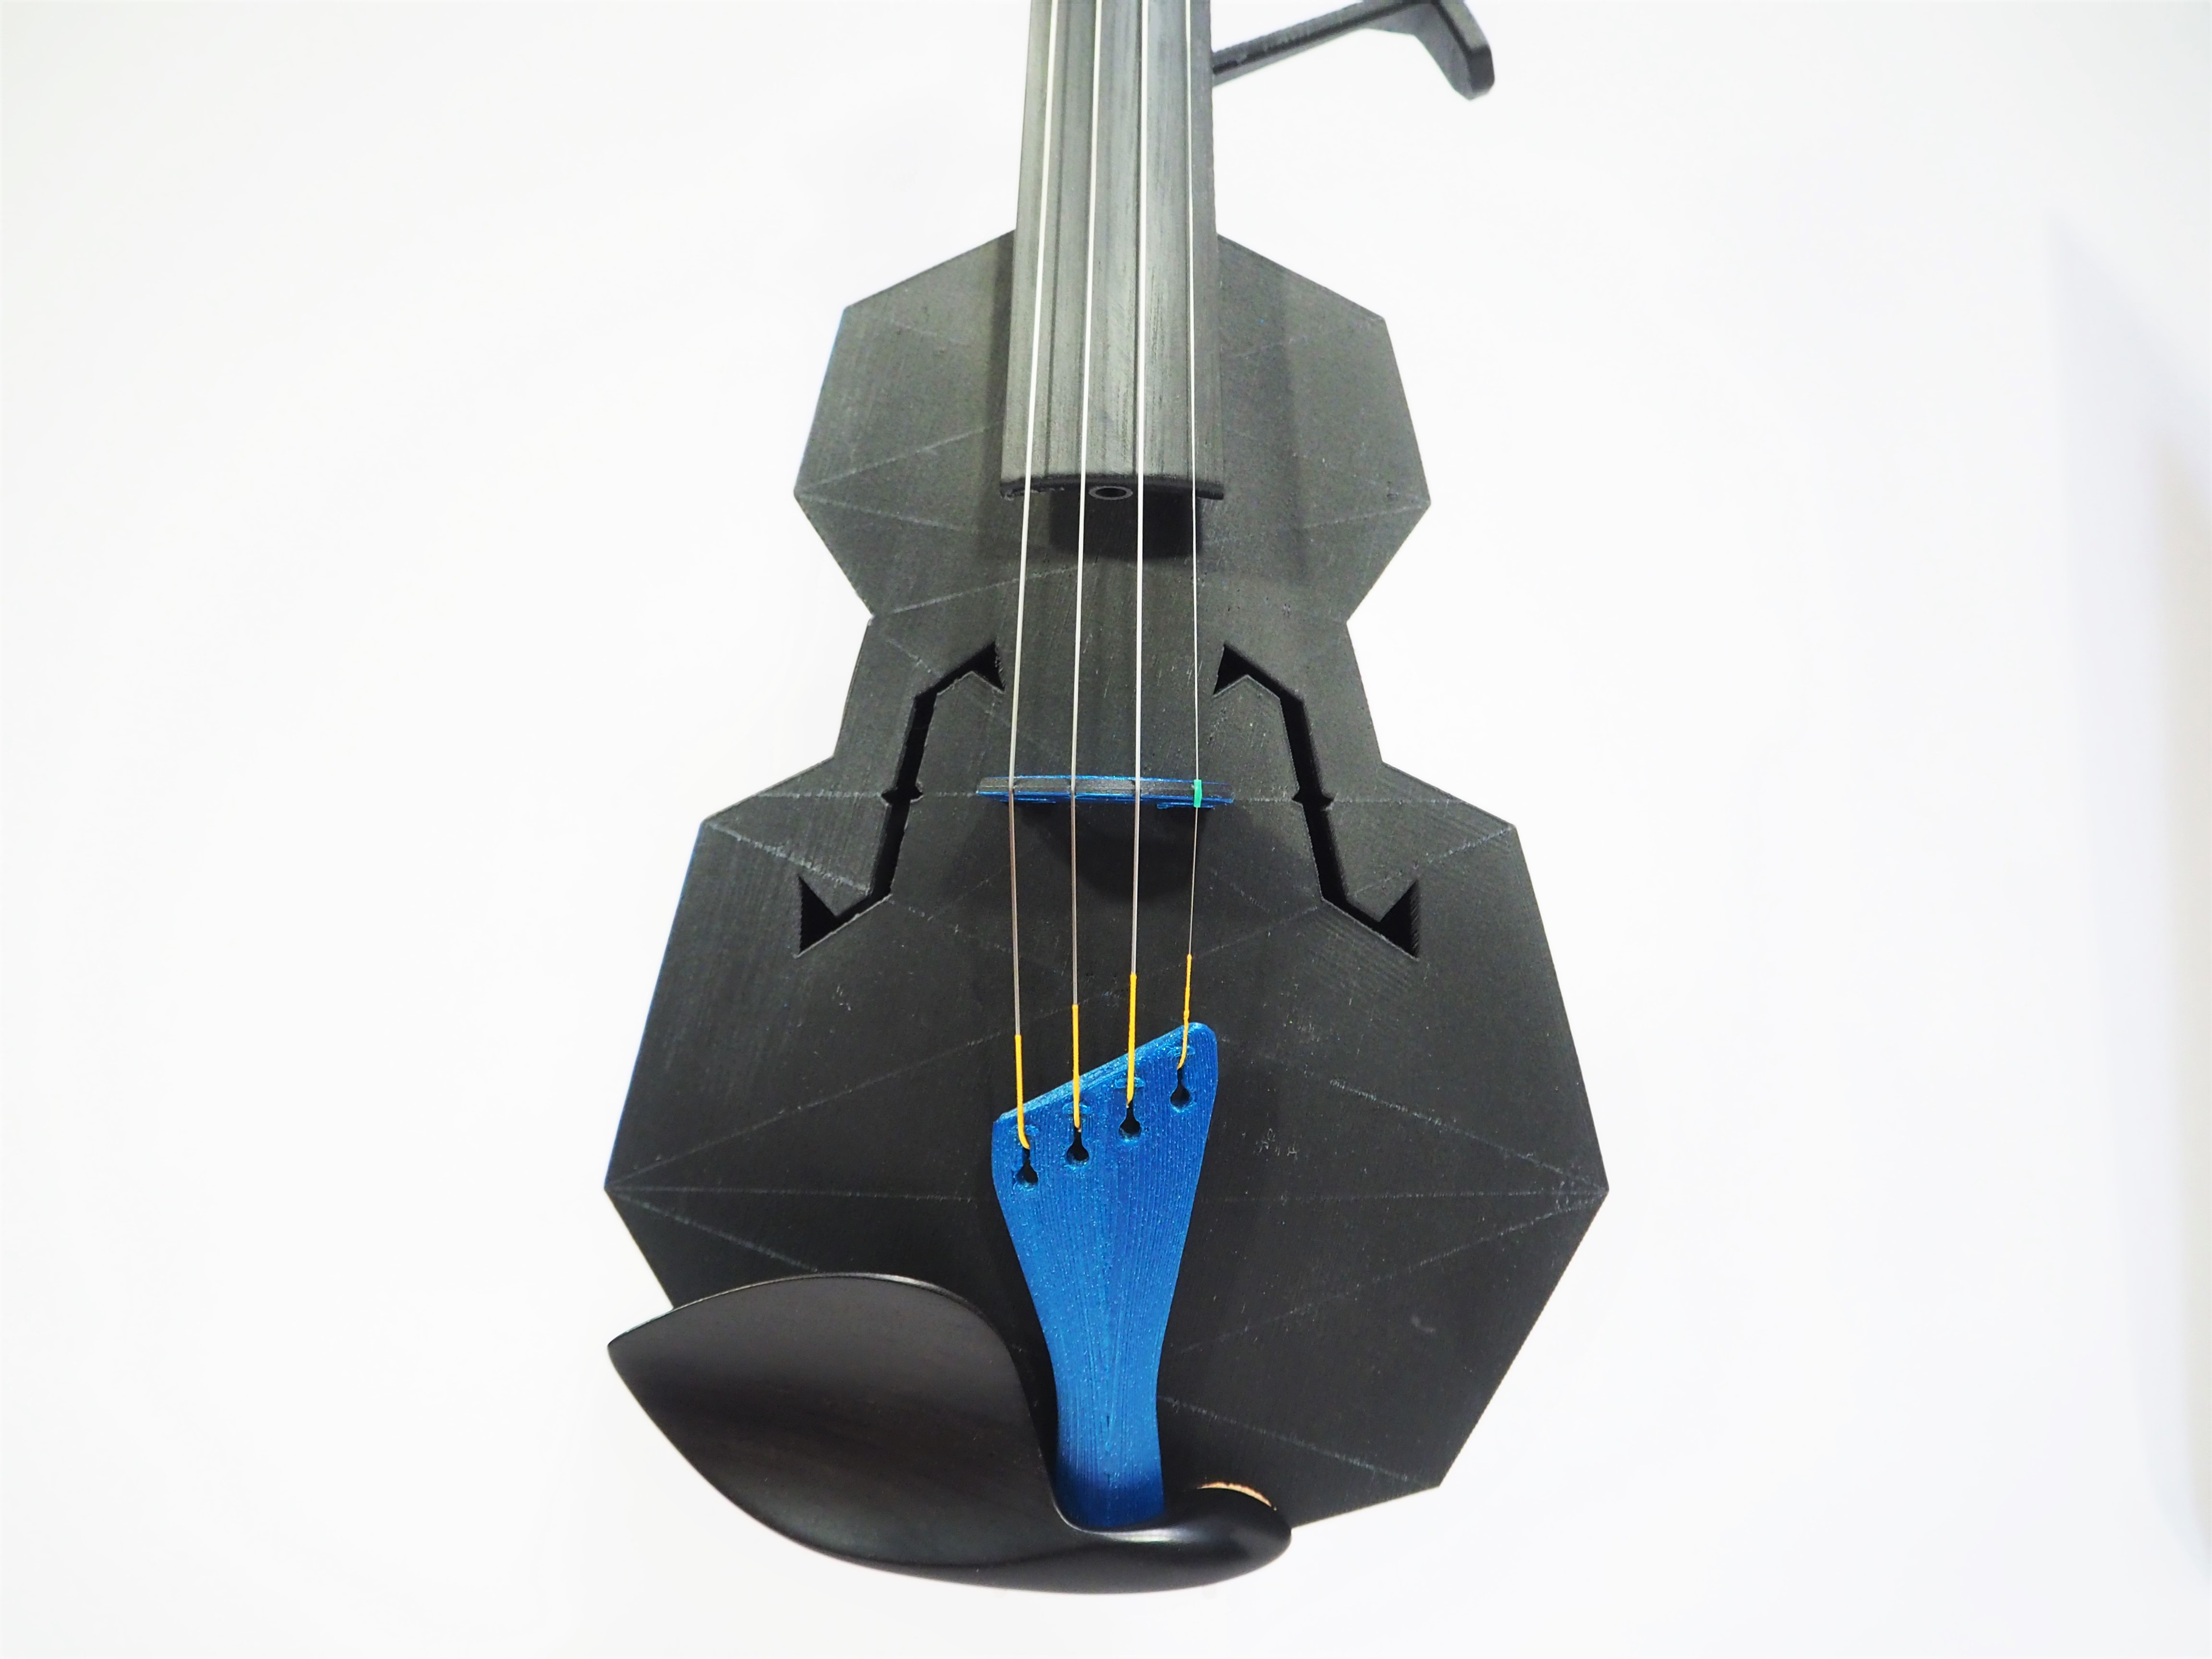
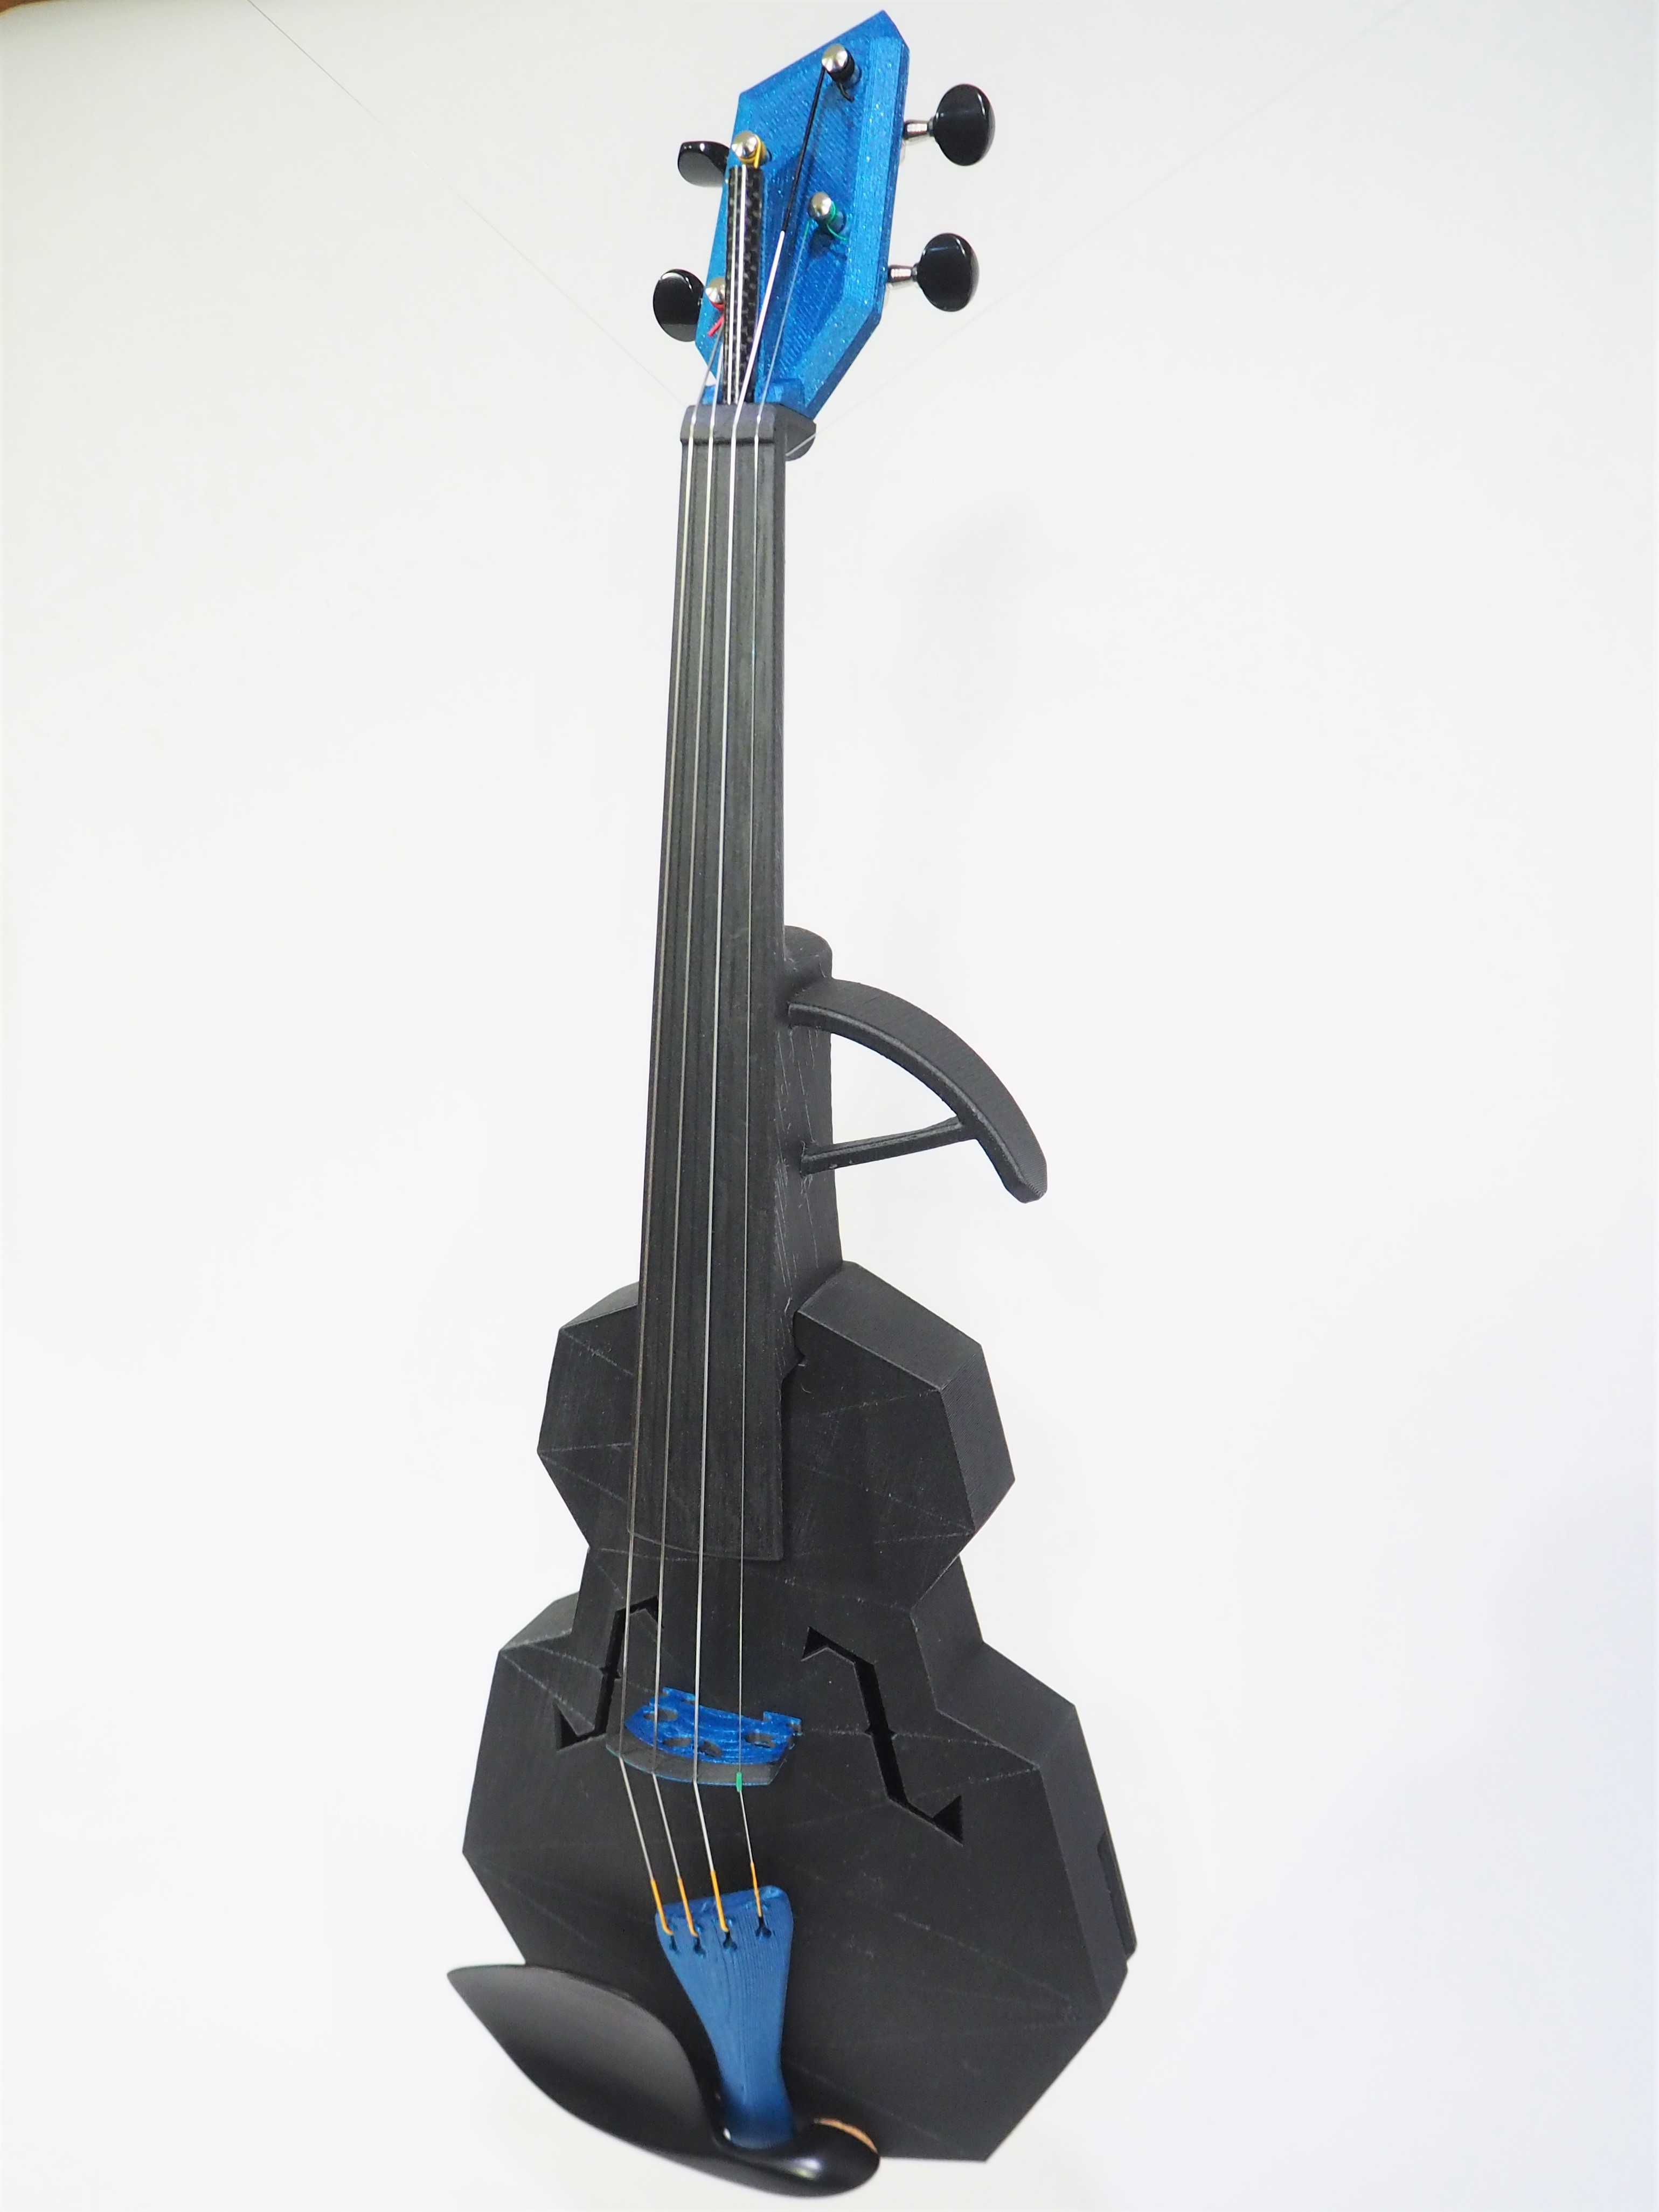
Now proceed as per usual to build up a Modular Fiddle! The joints will require some additional work to get the fit just right, but otherwise it is a normal build from here on.
Also, note that you need to print and install a saddle on the body. See the instructions for more info.
Pretty Pictures for Motivation
Community member Ben Haack printed one of the early versions of this design and took some beautiful pictures of his fiddle. His scaffold ribs were printed intersecting with the body, so he had to work hard to remove them, and then he did a bunch of sanding to clean up the body. The work paid off, though, because the fiddle is beautiful! Check it out!
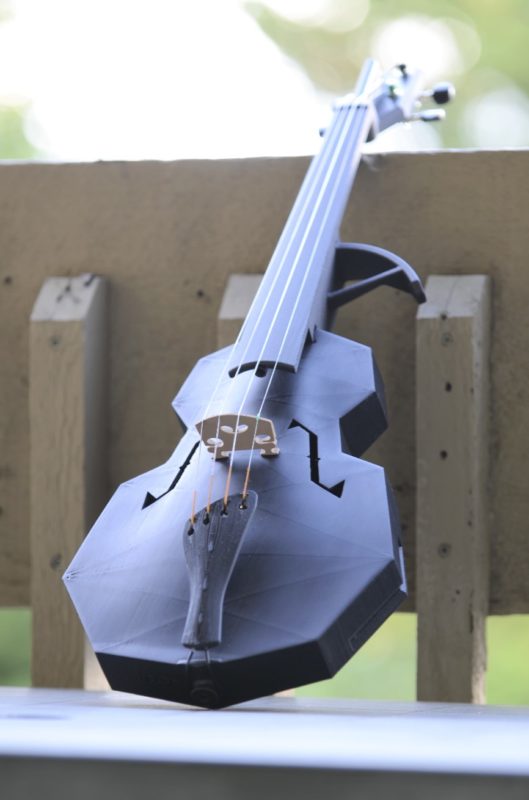
And here’s my most recent build, using the body shown in the process photos of this post.