
3D Prints, Product Design
How to Design a 3D Printed Violin Bridge
Oct
The 3D printed Modular Fiddle provides a platform for experimentation in violin design. Any part can be changed in about ten minutes, but only one part can print in six minutes, install in three minutes, and change the instrument’s sound entirely. The bridge!
If you’re a luthier, you already know that small changes to a violin’s bridge can have significant impact to that instrument’s sound. I had no idea just how true this is! Now that the body, neck/fingerboard, and pegbox on the Modular Fiddle are good enough, my first area of exploration will be the bridge. Step 1: construct a well structured digital design of a bridge so that changes can be precisely controlled and easily implemented. These are the steps I use for the digital design of a 3D printed violin bridge.
Start With a Sketch
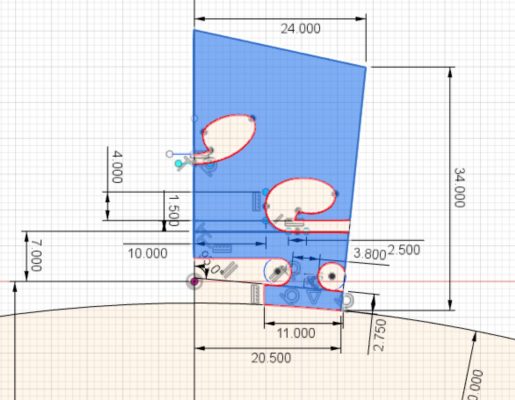
The base building block for this bridge design is the sketch, above. This 2D sketch is carefully designed to allow easy changes to important bridge dimensions. Once the bridge is complete, I can easily edit this sketch to test variations. To keep things simple, I only sketch half of the bridge.
Extrude Sketch To 3D
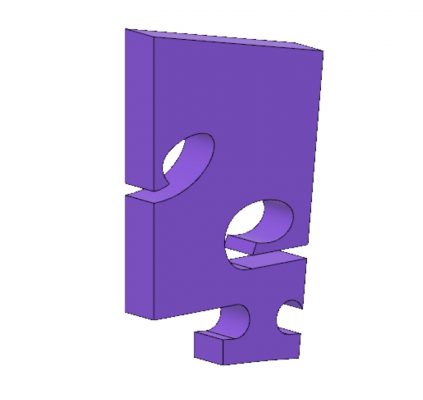
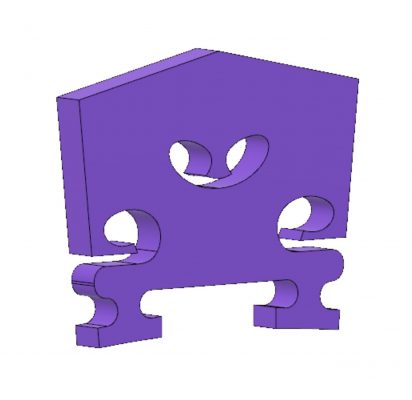
Now we go from 2D lines to 3D shapes by extruding the sketch profile into the third dimension. Then, we mirror that half bridge, shown above, to get to a complete bridge shape. This is the digital equivalent of a luthier’s bridge blank. It has the basic contours, but needs some final shaping.
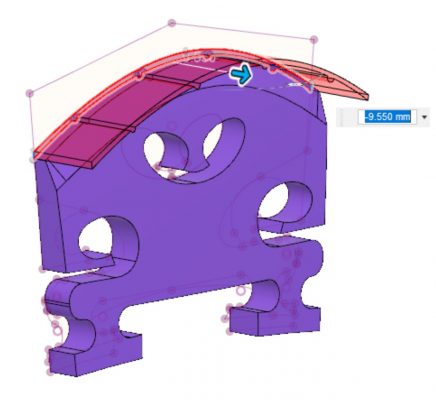
Start Shaping Bridge Contours
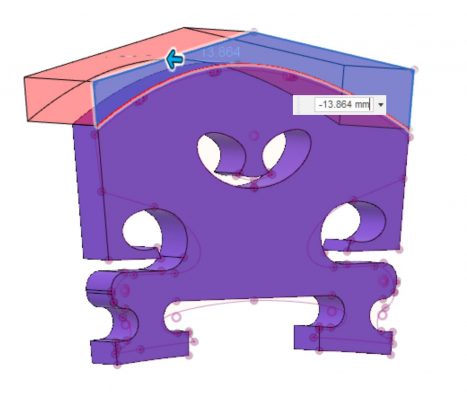
First we cut a slightly over-sized curve for the top of the bridge. Now it’s much closer to the right shape where the strings will rest, but it’s still uniform in thickness. Let’s make a t-spline surface to trim away thickness we don’t want. We’ll also add a chamfer to the top edge to thin it out quickly towards the top.
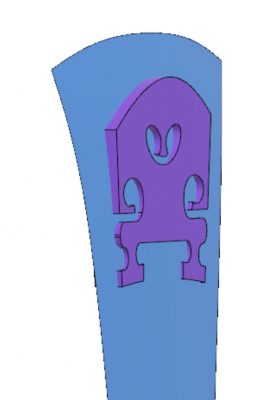
Cut Final Profile and String Grooves
With the basic thickness and top profile contours in place, we can go ahead and cut in the final profile and string grooves.
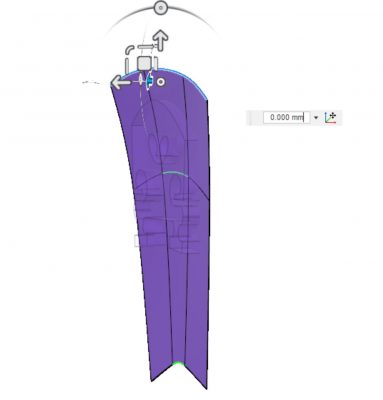
Cut Feet to Match Violin Body
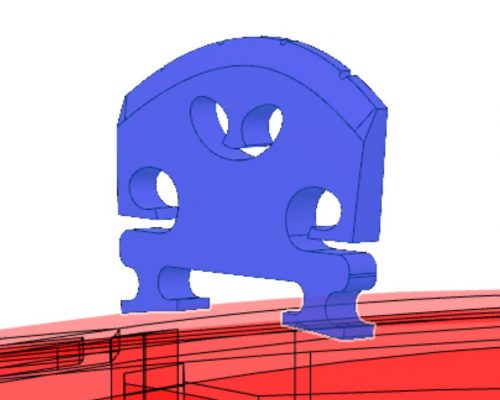
In computer modeling, it’s very easy to align or contour surfaces such that they match perfectly. Just like a regular bridge blank, the feet on this bridge need to be trimmed to match the violin body upon which it rests. By trimming the feet last, I ensure that even if the body design changes, the same bridge design can be used with minor alterations.
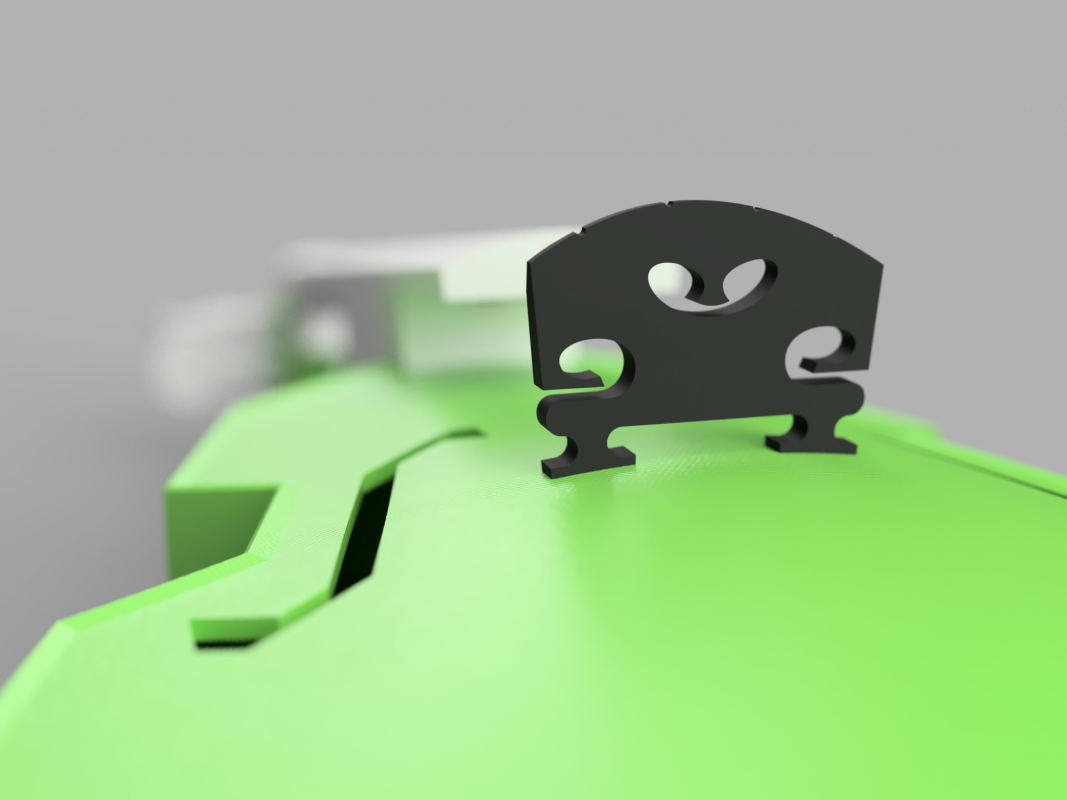
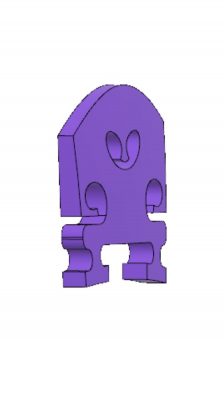
3D Print and Play
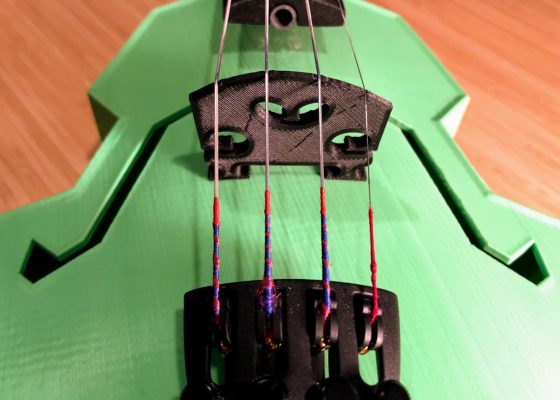
It takes mere minutes to print a bridge! Here’s this bridge installed on my ‘control’ instrument. This basic design now serves as the standard against which I will compare new designs. I’m looking for luthiers that would like to contribute professional knowledge by setting up the instrument properly with a wooden bridge. If you have the chops and interest — contact me to contribute!