
Client Projects, Product Design, Prototyping
How to Prototype a Transforming Shoe in Five Weeks
Jul
How do you crank out a quick product prototype on a tight timeline? By combining clever design and the power of 3D printing — and following these five principles.
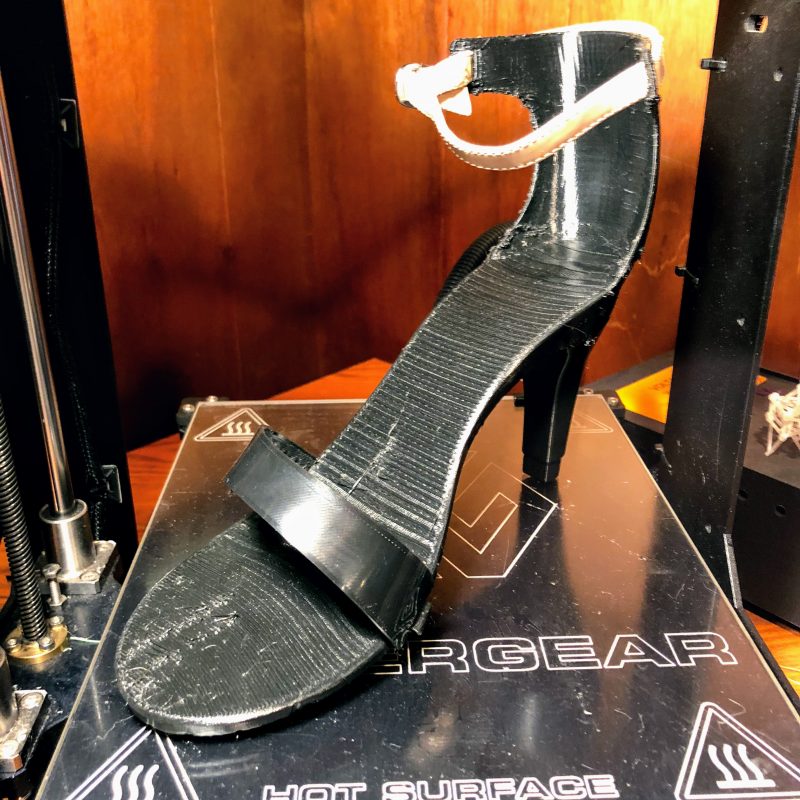
When my colleague Danny Peter at PDX Industrial asked me if I could prototype a transforming high heel shoe in six weeks I was sure we were in for trouble. What’s that? The client has an investor pitch so the deadline is fixed? Shoot, let’s do it — I love a good challenge!
We delivered a working product prototype five weeks from our kickoff date. That working prototype pitched investors for months and helped our client secure funds to take the shoe through development and into production. That prototype is one of my most unlikely successes! How did we do it? By following these five principles for how to print an awesome prototype for a tough product on a short timeline.
Principle 1: Don’t Overthink It
When the project started I had to prevent myself from uber-analyzing the mechanisms of the shoe. We didn’t need to make the best shoe ever, we needed to make a high heel with removable parts right now. I kept notes of any extra ‘uber-analysis’ to revisit when the shoe was ready for a more substantial design effort.
Principle 2: Identify and Test Risks
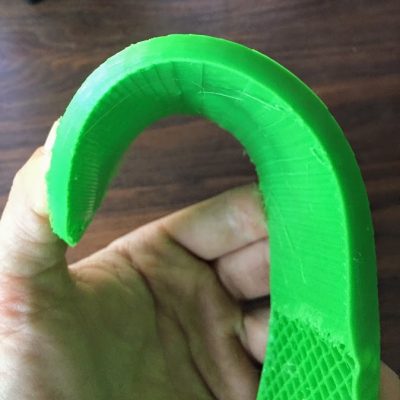
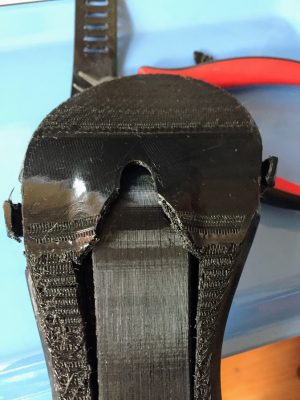
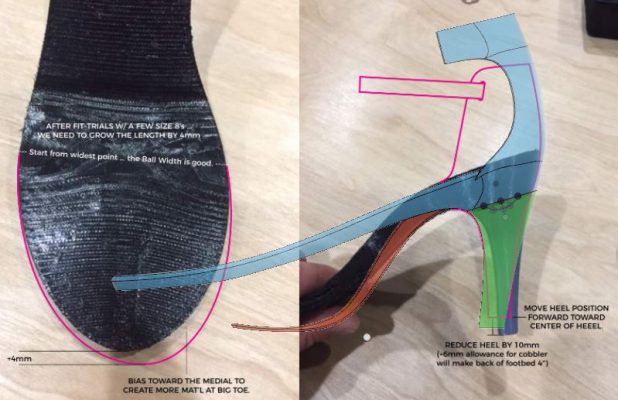
The shoe required the flexibility to function as a 4″ heel or as a flat. We needed materials that could flex substantially and maintain strength over time. Additionally, how can I print the shoe such that it doesn’t look terrible and take forever to 3D print? With a five week timeline I don’t have time for 24 hour prints! I also don’t have time to order prints from a third party. We needed to crank out test parts and make revisions on a day-to-day basis.
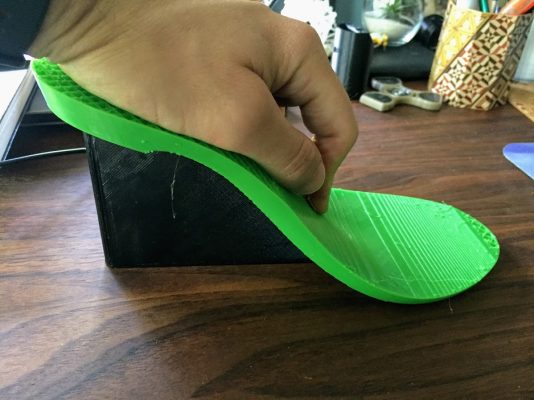
Our first test was to print something shaped like a midsole as a sanity check, and to answer the above questions. While Danny refined the industrial design, I hacked out something to print.
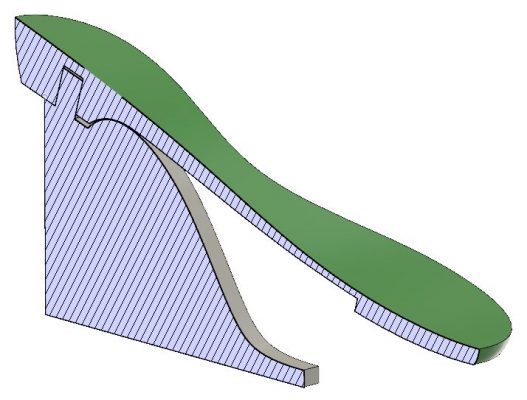
Someone is walking on it — will my in house materials be strong enough or will I need to order parts? If I need to order parts we may be in for trouble, but if the product prototype breaks during a demo it could mean disaster for my client. I hacked out some heel-looking parts with likely-seeming thin sections. Some simple hand testing showed that PETG would likely be just barely strong enough. I never did feel 100% comfortable with the strength of the parts, but this was a sacrifice we had to make to hit the deadline.
Principle 3: Hack it Out
There is a time to craft the perfect CAD design (like this one). Few things are as satisfying as CAD that is easily edited, updated, and built upon. An elegant CAD design can contribute substantially to a product’s success. Enough — we don’t have time for that! Just make a thing on the screen that looks like a shoe! Print it out, does it work?!
We hacked things out for that preliminary testing. Those hacks were improved upon to make them look more like a shoe. Once we got a thing like a shoe, features were added to increase functionality. It was all a hack! Pro-tip — everything good starts as a hack job.
Principle 4: Print Constantly
Are the printers running tonight? If not — that’s a missed opportunity. Be strategic, though! I structured my design time during the day to get to testable points for overnight prints. Don’t try to finish a design in a day, and don’t try to perfect the tangency on those surfaces — just get to something you can test. Then print it. Repeat.
Principle 5: Integrate Features to Eliminate Assembly
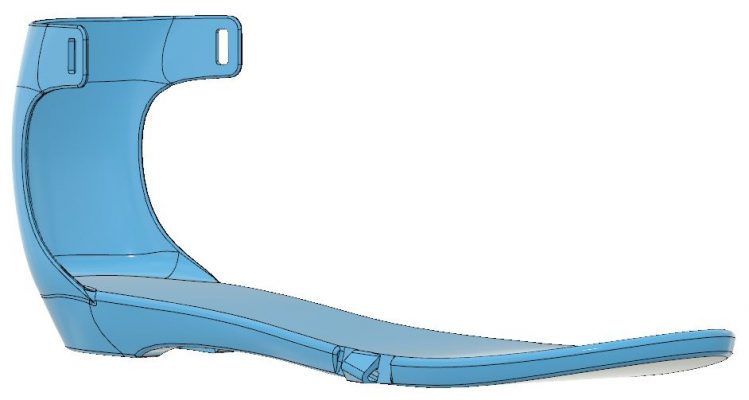
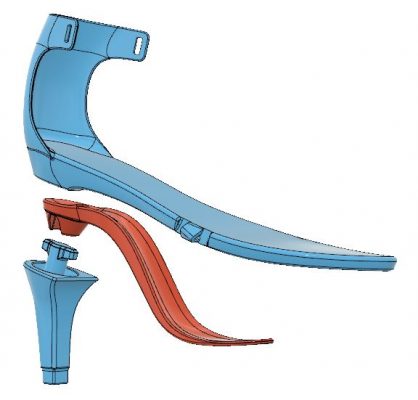
A shoe is typically an assembly of many materials all stitched, glued, and molded together. Every assembly process that we could eliminate from the shoe meant extra time for design and development. Using the capacity and flexibility of 3D printing we were able to make the prototype shoe from a minimum number of parts. Strap mounts are integrated into the midsole. Rubber is painted onto the 3D printed midsole and heel to add grip. The midsole part is printed with a heel counter and all the features needed to attach the heel. We almost completely eliminated all final assembly. It’s a good thing we did, too, because the shoes were at FEDEX within six hours of the final layer of 3D printed plastic.
Our client, Pashion Footwear, is now selling production shoes, and offers the first fully convertible high heel shoe on the market. You can check out there stuff and order shoes on their website. I’m proud to say that they were able to wear this quick turn product prototype to all of their early investor meetings! Nothing sells an idea like being able to truly demonstrate it.
Do you need a product prototype? Get in touch! But do it soon — I do like to have a little breathing room on my projects.