
Product Design, Prototyping
Make Your Prototype a Product
03
Oct
Oct
Product designers use 3D printing to blur the line between a 3D printed prototype and a finished product. A 3D printed product is always a work in progress — it’s a prototype. Make your 3D printed prototypes stand-alone products and you’ll have a better end product and more fun along the way! Curious what the prototyping process is like? Check this blog post where I break down my process for cranking out a quick, functional 3D printed prototype of a high heel shoe concept.
Step 1: Live With It
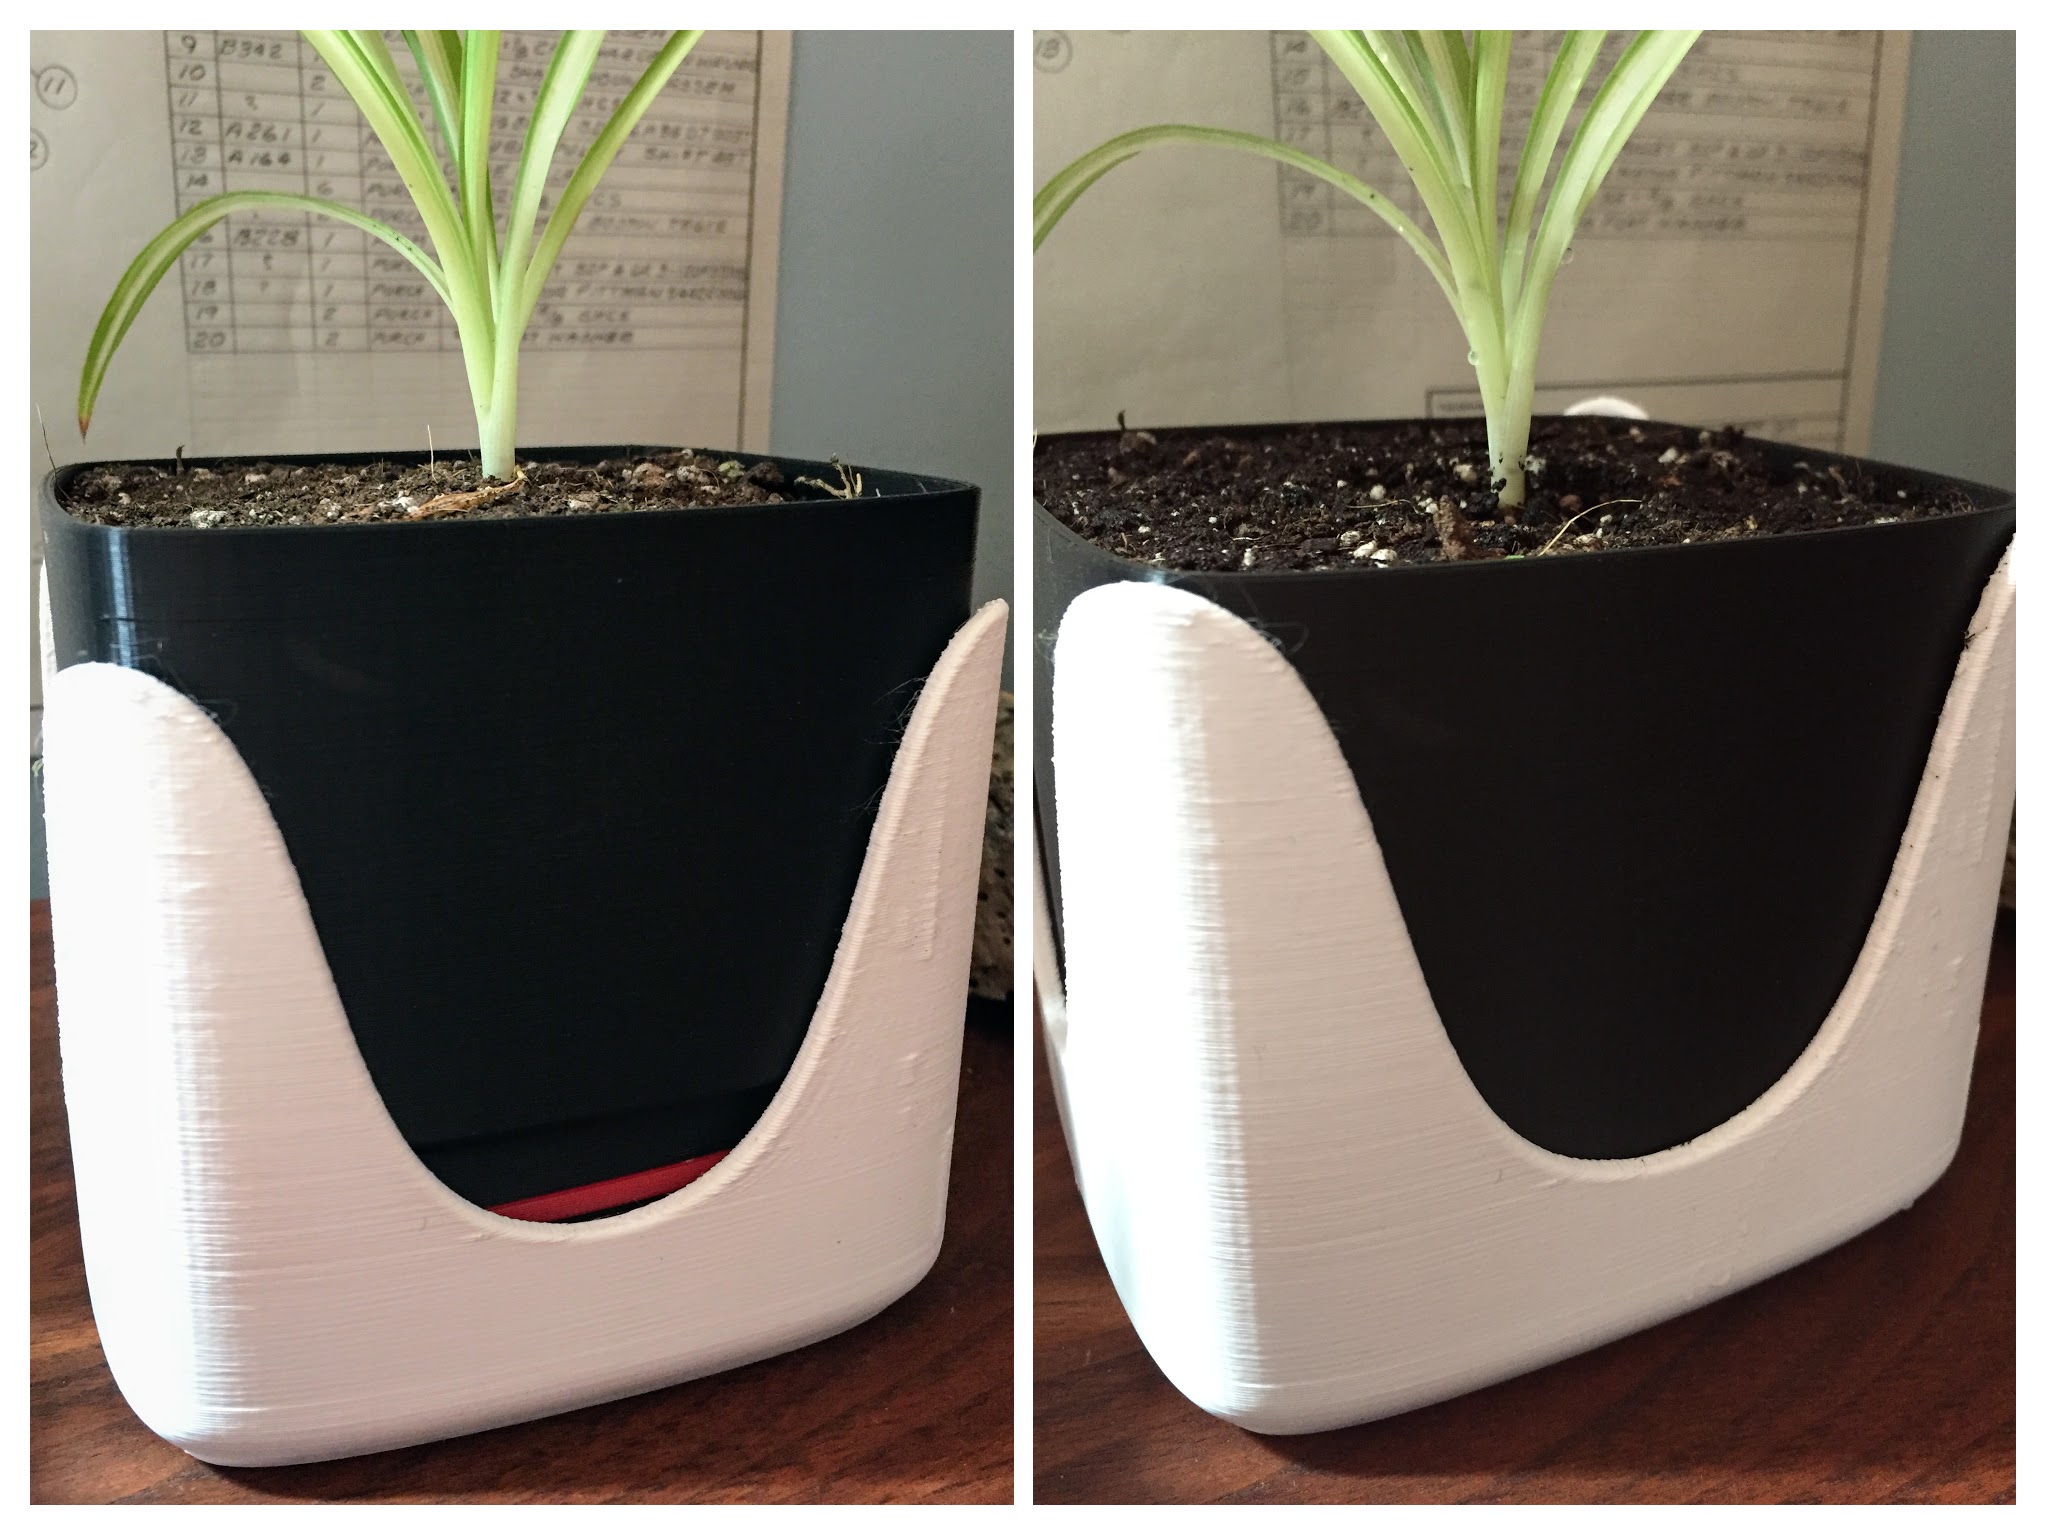
I love this planter. Seriously! During the first couple weeks of use, I eagerly checked the pot height to see if it had changed. The anticipation of seeing that ‘water needed’ indication was real! Sure enough, it worked, and the edge popped up above the outside band — time to water! Not only was it cool to watch the pot rise over time, it was equally fun to water and watch it return back down to below trigger level. These days I no longer watch eagerly for the trigger, but I do notice it when it shows, and when I wonder if it needs water I give the planter a quick glance.
My plant loves it, too. The spider plant is bigger, greener, and happier. Now if my cat would quit munching on it…apparently spider plants are mildly hallucinogenic for cats.
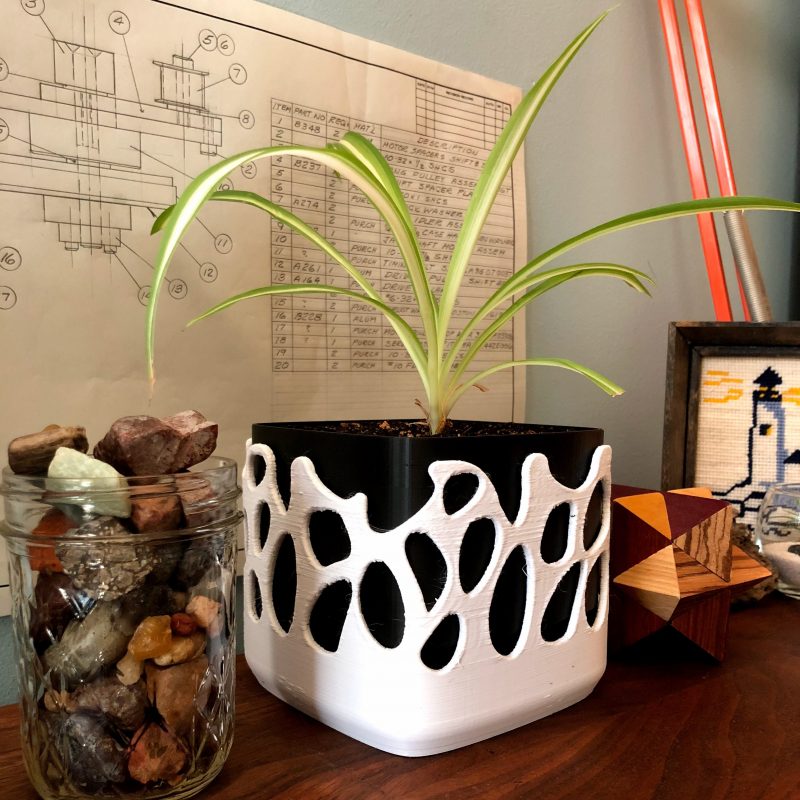
I tired of the chunky plastic planter on my desk. Most of all, I tired of the thick trigger band, so I took it off. It’s ugly! The wave pattern on the base contrasting with the pot is pleasing. The band is not pleasing. More important: when people first look at the planter with the big band, they don’t know why that band is there. It just looks like an extra part, an extra ugly part! This needs to be fixed.

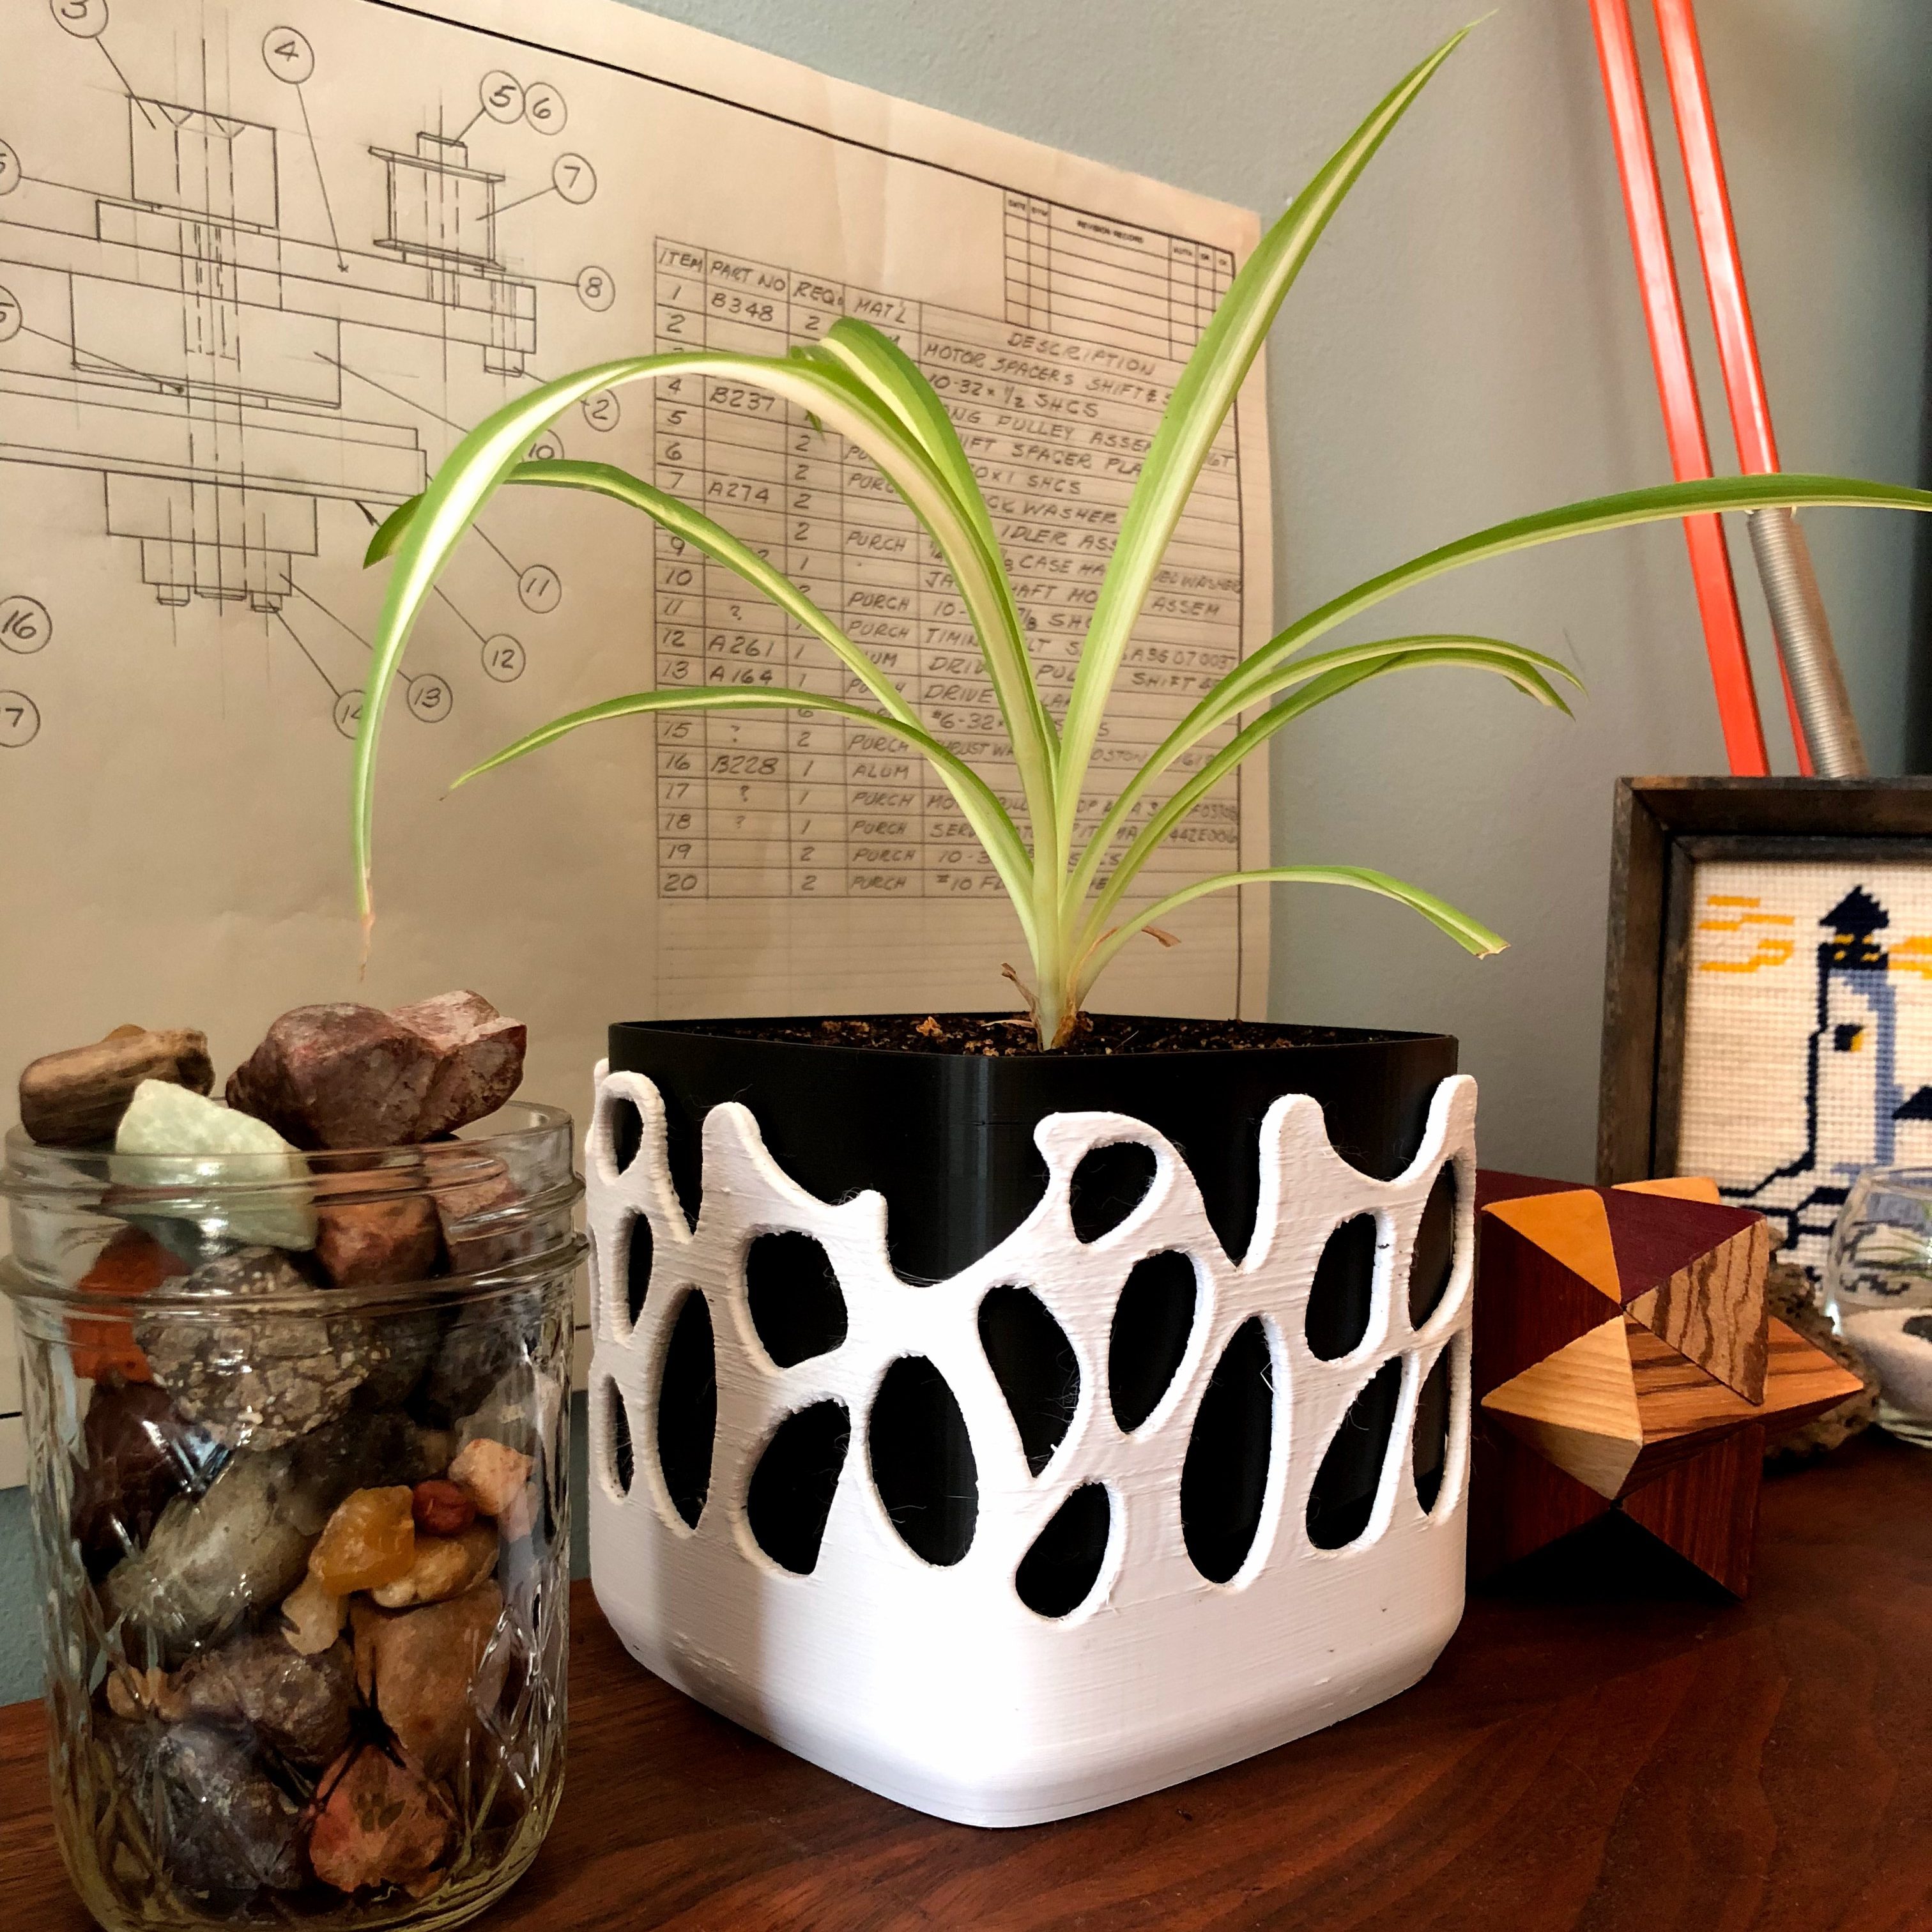
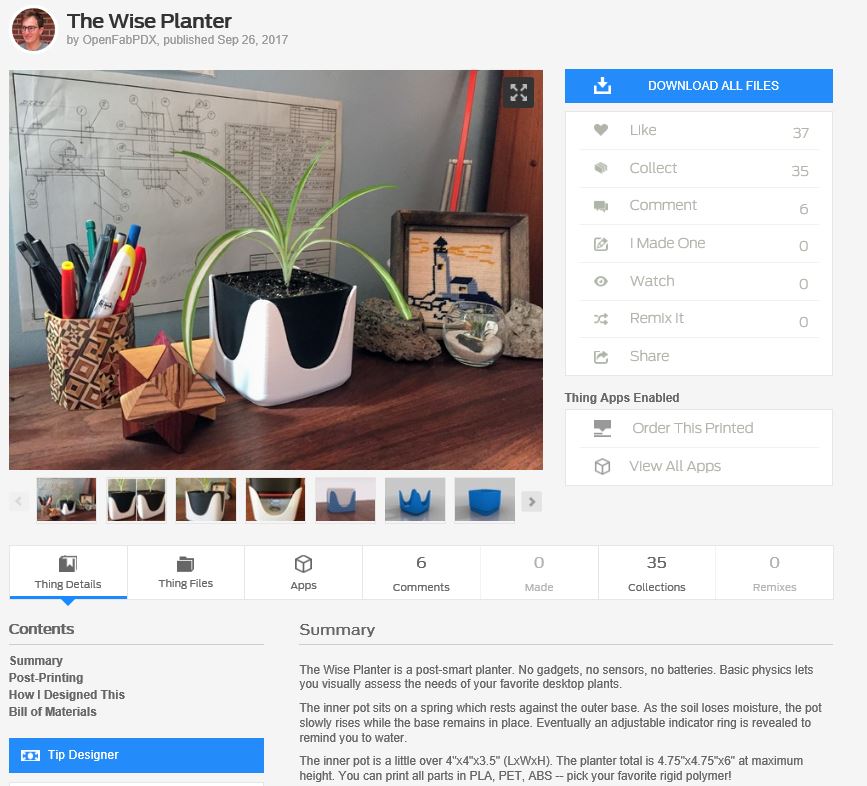
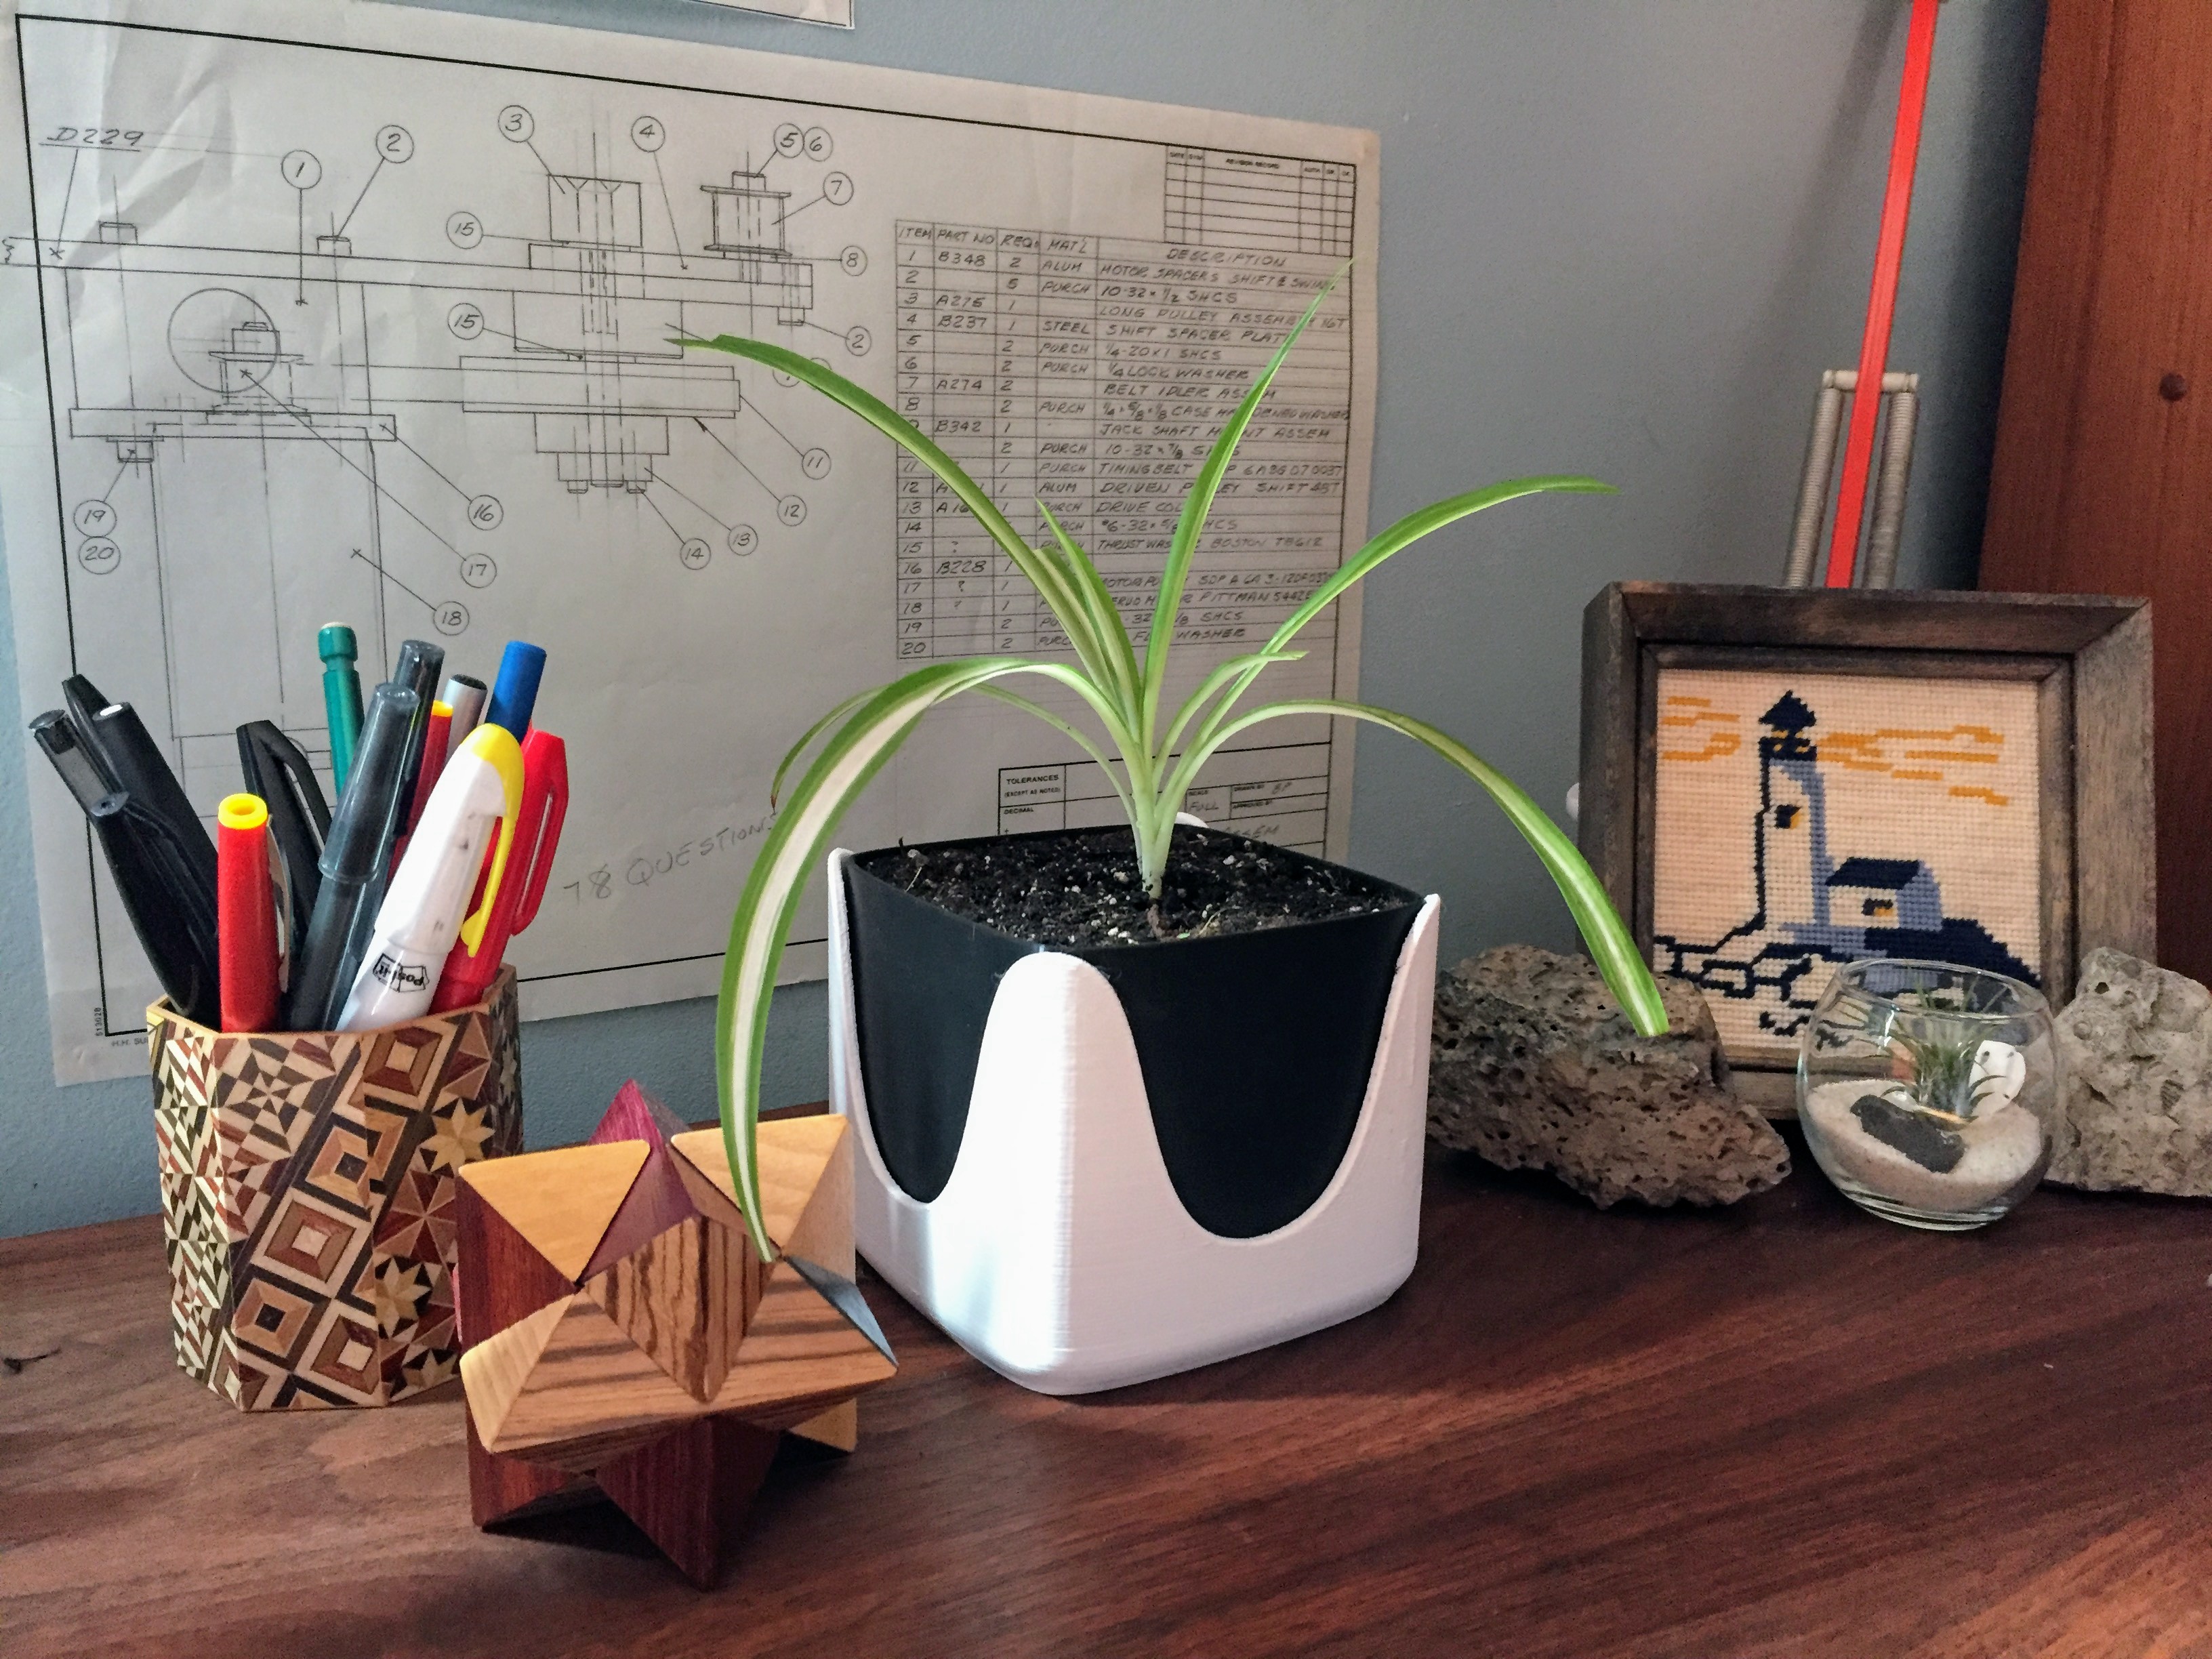 The revised planter, now called The Wise Planter, is a thing of simple beauty. Gone is the flat band and bright colors. In its place stands a simple looking pot with a hidden secret. The red indicator band. It’s revealed when water is needed and otherwise is completely hidden.
 Pretty great, huh? Maker Faire gave me the perfect place to wow the masses with my genius invention. The simplicity of the mechanism and the sneaky reveal of the red trigger band gave most passers-by a very satisfying Eureka moment. I also received very useful feedback on pricing and sales paths, and I learned a ton just by watching people view and interact with the planter. Everyone especially loved the Voronoi version that I printed. (It’s still a work in progress, but I had a first attempt at Maker Faire.)
 Key takeaways from all the exposure were:
 Just do it. Share it for free. If you think the idea is so good that someone will steal it, well, then you’re super smart! If you can’t make a better product than the person that takes the idea — guess what — it wasn’t going to work out in the first place. The feedback you get from sharing will improve the product, and the visibility that follows will bring eyeballs to you and your product. Also, as you share your things more freely, you will feel liberated. More on that another time. Check out all my stuff on Thingiverse here.
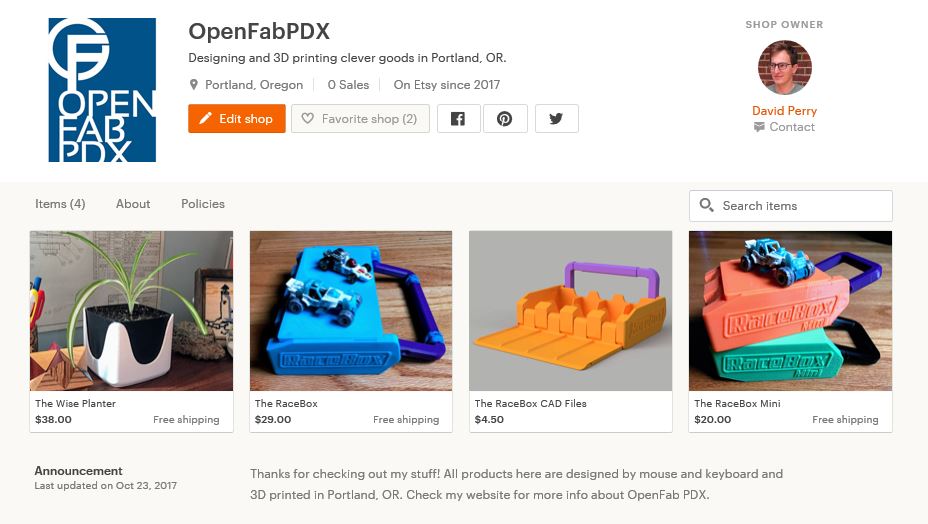 This is when the rubber hits the road. The planter is cool and clever, yes, but will it sell? What do I have to do to sell it? Whatever it is I have to do — that’s what needs to be addressed in the next revision! I think it’s OK to wait to do this step until after your next revision, but that’s a gut check for you to do. I’d be amiss if I didn’t let you know that you can visit my Etsy store.
Treat your 3D printed prototypes like stand-alone products, and you will end up with a better product.
Let’s examine the planter to see what this prototype as product process looks like in action. If you haven’t yet, you can review the process behind the design of the planter. It’s a series of three blog posts. Here’s part 1.Step 1: Live With It
I love this planter. Seriously! During the first couple weeks of use, I eagerly checked the pot height to see if it had changed. The anticipation of seeing that ‘water needed’ indication was real! Sure enough, it worked, and the edge popped up above the outside band — time to water! Not only was it cool to watch the pot rise over time, it was equally fun to water and watch it return back down to below trigger level. These days I no longer watch eagerly for the trigger, but I do notice it when it shows, and when I wonder if it needs water I give the planter a quick glance.
My plant loves it, too. The spider plant is bigger, greener, and happier. Now if my cat would quit munching on it…apparently spider plants are mildly hallucinogenic for cats.
I tired of the chunky plastic planter on my desk. Most of all, I tired of the thick trigger band, so I took it off. It’s ugly! The wave pattern on the base contrasting with the pot is pleasing. The band is not pleasing. More important: when people first look at the planter with the big band, they don’t know why that band is there. It just looks like an extra part, an extra ugly part! This needs to be fixed.
3D Printed Prototype Means Easy Changes
The band was just killing me. I didn’t want to show it to anyone, and I couldn’t get past it to start to analyze other aspects of the design. It needed to be fixed, stat. Moreover, I wanted to get the planter on Etsy in time for Portland’s Maker Faire! Because this planter prototype is 3D printed, changes are easy. I have worked out the more time consuming aspects of the design, so now I can take a few hours to CAD up a new band design, print it, and immediately have an improved product.With a 3D printed product (or prototype) I can easily make incremental changes with very little risk.
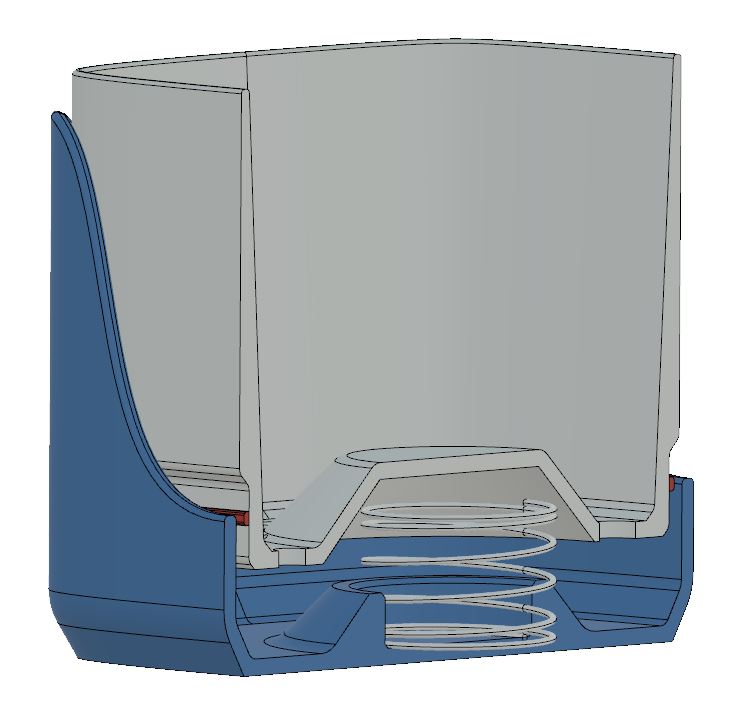
So that’s just what I did. I gave myself a couple weeks to design, model, and print a new planter. I won’t go into detail on the design process, but the change was simply to move the band the outside of the base to the outside of the pot (inside the base). See below.
Here, above, an external band is moved to hide the lower edge of the pot.
The second version, shown above, moves the band to the pot, hiding it entirely until the trigger point is reached.
I made some other easy changes while reworking the band design. Most changes were for aesthetics and easier printing — I thinned out some walls, eliminated the need for support material, and slimmed down the bottom of the base with a chamfer/fillet combo move. I also adjusted the fit between base and pot slightly.Step 2: Manufacture it
With a revised band design I felt good about, I was ready to crank out some planters. I wanted a handful of planters available for purchase at Maker Faire, so I set to work printing bases and pots as quickly as I could. Concurrently, I worked on pricing the planter on Etsy. I figured target pricing for this planter is $20-$30. That makes it a bit more expensive than a standard desktop planter, but the increase in cost fits with the value added. It took about 14 hours of printing to make one planter. If I were printing these for a customer, they’d be at least $100! That’s a big gap between target pricing and printed part cost.Let’s be real. 3D printing is not the best manufacturing method for this product.
I’m considering gearing up to produce the planter using ceramics and molded parts. For now, while I’m still tweaking the design, it will continue to be a 3D printed prototype (product). As such, I need to get my print times and material consumption down as low as possible. That means minimizing wall thicknesses and part height, and generally reducing material use.Step(s) 3: Show it Off
The revised planter, now called The Wise Planter, is a thing of simple beauty. Gone is the flat band and bright colors. In its place stands a simple looking pot with a hidden secret. The red indicator band. It’s revealed when water is needed and otherwise is completely hidden.
Pretty great, huh? Maker Faire gave me the perfect place to wow the masses with my genius invention. The simplicity of the mechanism and the sneaky reveal of the red trigger band gave most passers-by a very satisfying Eureka moment. I also received very useful feedback on pricing and sales paths, and I learned a ton just by watching people view and interact with the planter. Everyone especially loved the Voronoi version that I printed. (It’s still a work in progress, but I had a first attempt at Maker Faire.)
Key takeaways from all the exposure were:
- “Why is it 3D printed?” (Translates to: Design a version that utilizes the unique abilities of 3D printing, like the Voronoi.)
- “Oh, wow, that’s so simple!” (How can I make it simpler?)
- “Oh my sister needs this.” (Target gift market. Portland’s Saturday market was suggested.)
- “I’d pay $15; $25; maybe $30.” (I had it listed at $48, price needs to come down to $30 to make it an ideal gift. Best would be to have a few versions at different price points.)
- “Look it bounces!” (Bouncing is fun, but distracting and a little cheap. Either embrace it and do something with it or limit bouncing.)
- “It looks good.” (No one was very excited by the visuals of the traditional ‘wave’ planter. Not ugly, but not exciting. They were more interested in the Voronoi.)
Step 3b: Publish the Design (Thingiverse or Similar)
Just do it. Share it for free. If you think the idea is so good that someone will steal it, well, then you’re super smart! If you can’t make a better product than the person that takes the idea — guess what — it wasn’t going to work out in the first place. The feedback you get from sharing will improve the product, and the visibility that follows will bring eyeballs to you and your product. Also, as you share your things more freely, you will feel liberated. More on that another time. Check out all my stuff on Thingiverse here.
Step 3c: Try to Sell It
This is when the rubber hits the road. The planter is cool and clever, yes, but will it sell? What do I have to do to sell it? Whatever it is I have to do — that’s what needs to be addressed in the next revision! I think it’s OK to wait to do this step until after your next revision, but that’s a gut check for you to do. I’d be amiss if I didn’t let you know that you can visit my Etsy store.
Step 4: Revise it Already!
OK, enough beating around the bush. You have the info you need. Go revise your prototype and quietly push out a better product. Here’s my game plan for the planter:- Flesh out revised mechanism design (I have a good idea) to address:
- Bouncing
- Calibration
- Spring sensitivity and selection
- Consider new aesthetics around new mechanism.
- Create smaller planter to hit $20 price point.
- Edit existing planter as needed to hit $30 price point.
- Revise and complete Voronoi version to hit $40 price point.
- Offer customization for higher price points.