3D Prints, Product Design
The F-F-Fiddle Means You Can Make Anything; Here’s How
Oct
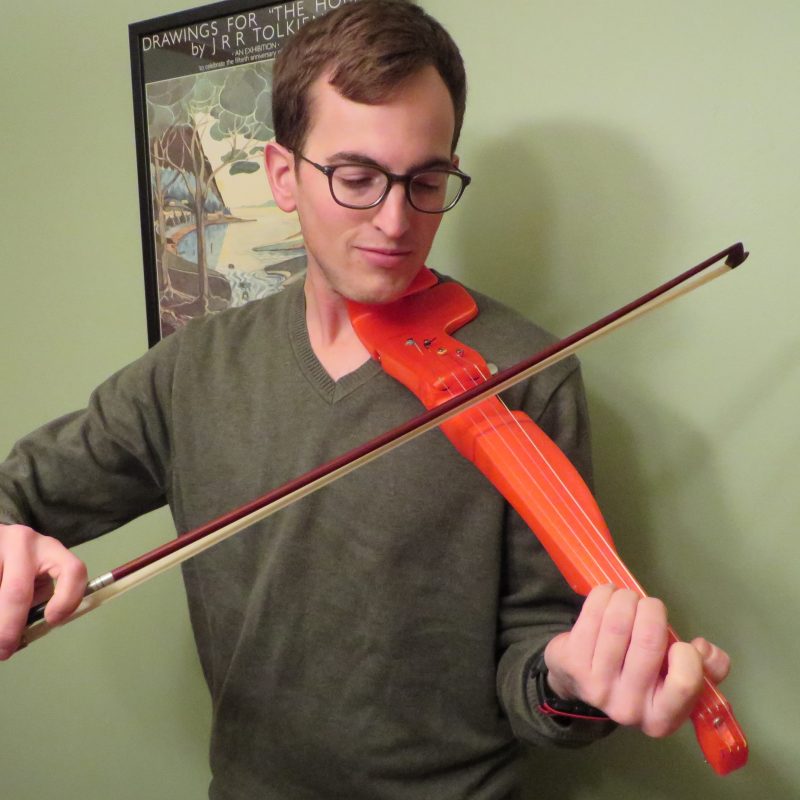
You don’t need to be a master craftsman or an industry expert to make something new and exciting. If you are willing to try and fail (repeatedly): you can make anything! Before I made the F-F-Fiddle, I’d never made a musical instrument. I started playing the violin when I was in grade school, and I’ve always wanted to make a violin, but I thought I’d wait until retirement — the barriers to entry for that kind of craftsmanship are so high. Then, in early 2013, I bought a 3D printer. Suddenly I had this robot that could make complex, accurate parts that I modeled on the computer. It could make anything! All I needed to do, then, to make a violin, was to design and model it on the computer and print it out. Shoot, I can do that all day! Let’s walk through the process I used to make the F-F-Fiddle: Research, Ideation, Design, Prototyping, Iteration. This is the same process that you can use to make, well — anything!
1. Research
All of my projects start with some research. For the F-F-Fiddle, I had to learn about electric violins. What do electric violins look like? What are the important components? I pinned violins that I liked to a Pinterest board to collect inspiration.
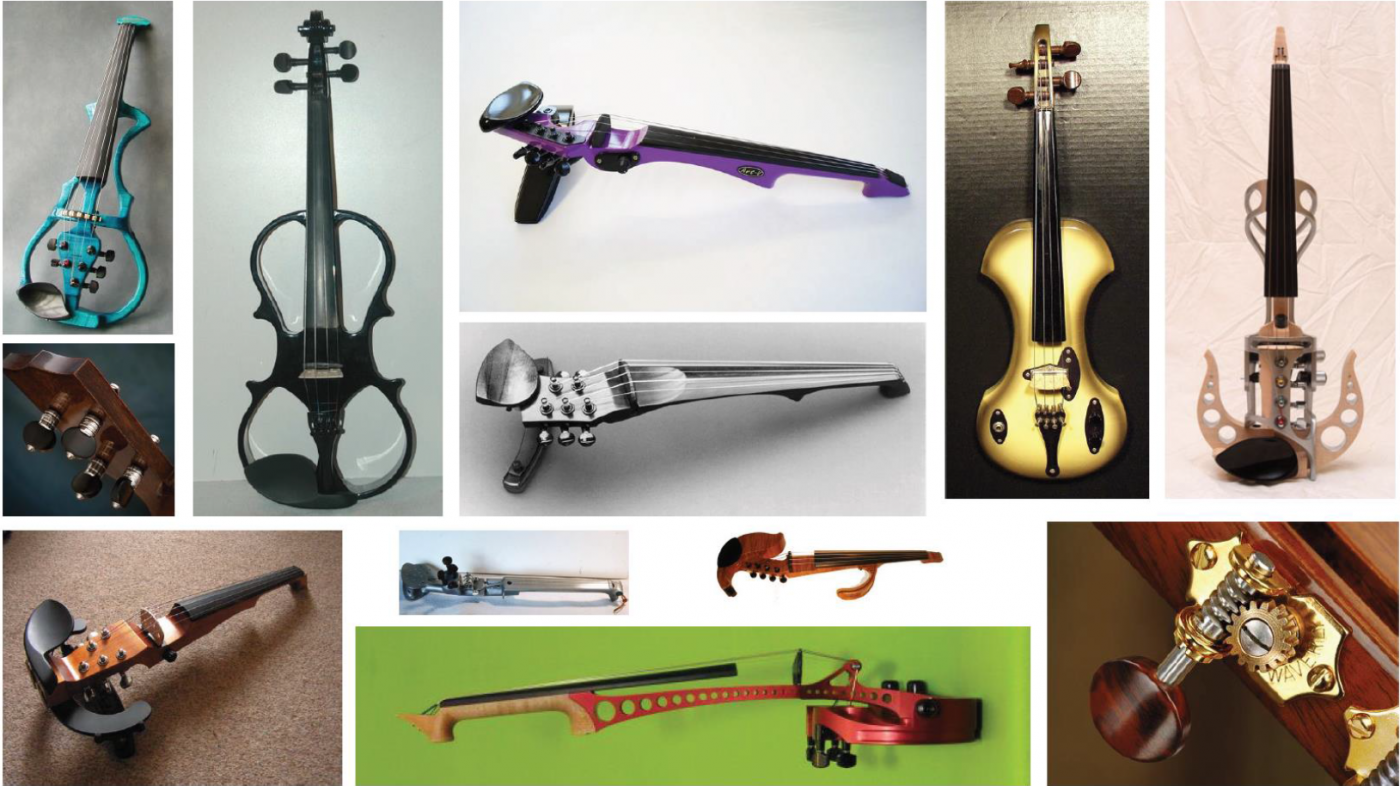
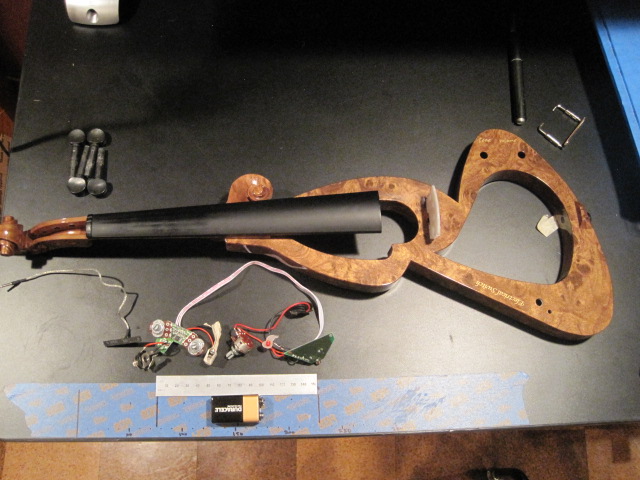
I also took apart an old (junk) electric violin that I got for $20 from a friend. Now, I love destroying things, but taking things apart is seriously important — it’s the best way to learn how your parts need to go together. I re-used the components from the junk violin for my first F-F-fiddle.
2. Ideation
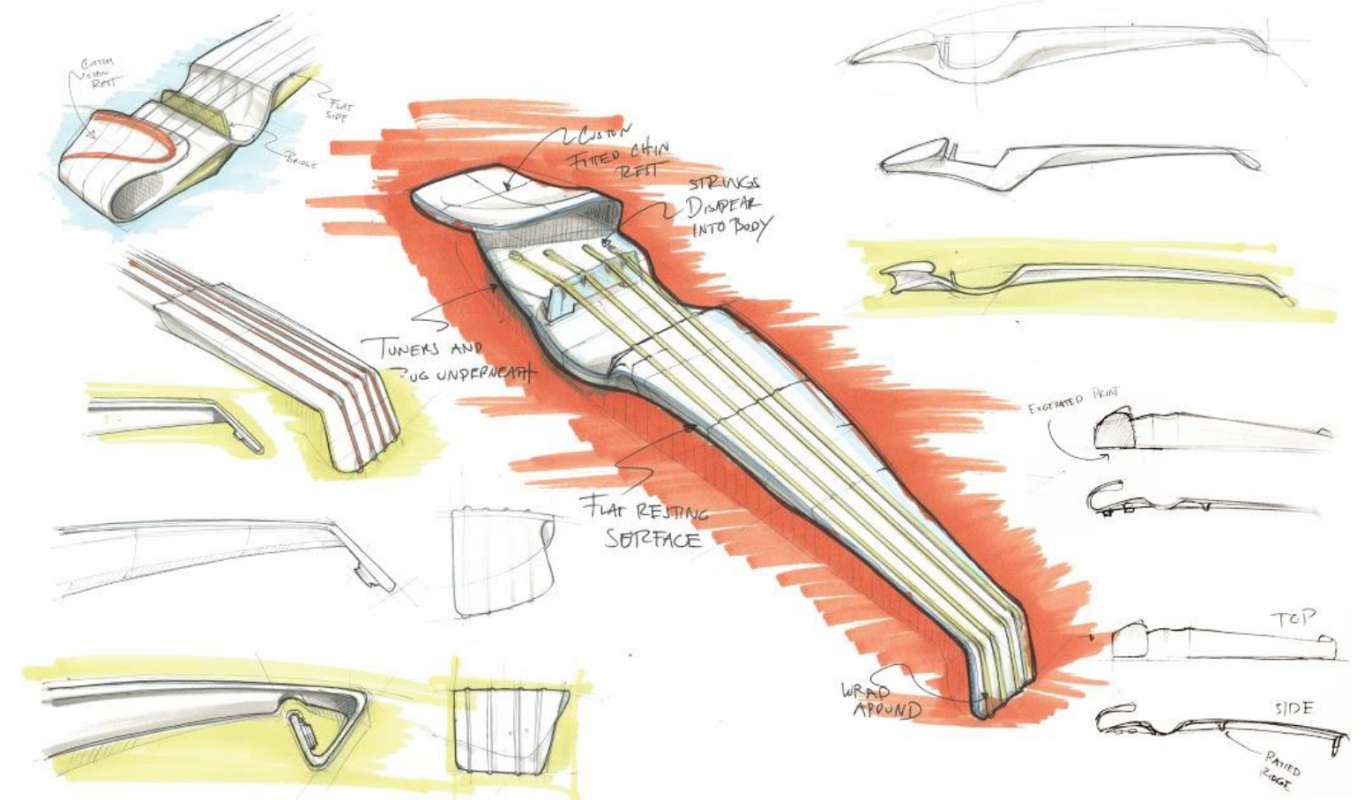
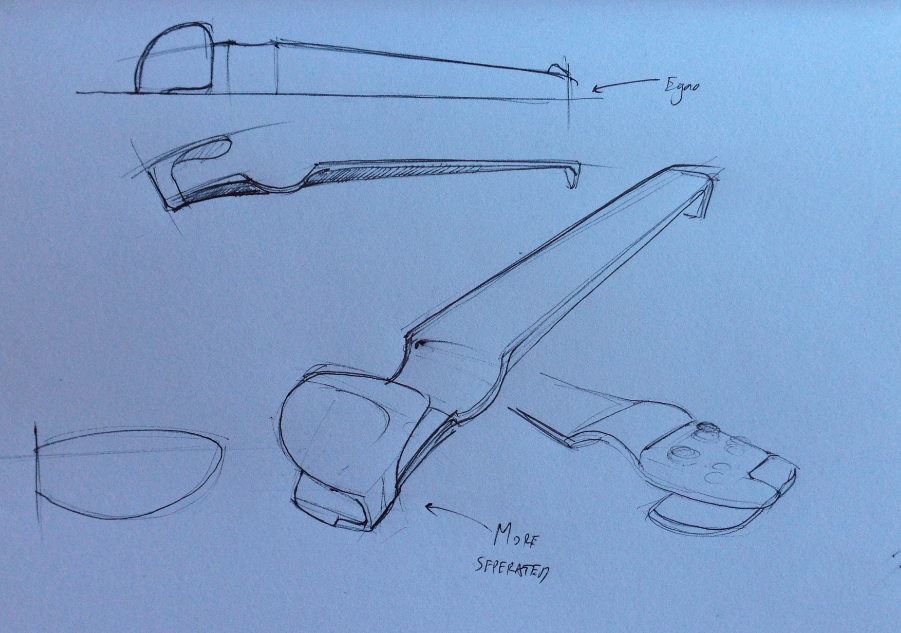
Armed with enough info about electric violins to be dangerous, I began the ideation phase. I modeled the necessary components (that I took out of the junk violin) in CAD and printed underlays — or outlines of the required parts that I could then sketch on. My sketching skills are poor, but regardless of skill level, the process of drawing is vitally important! I think it wakes up parts of your brain that (for me) typically lay dormant.
I brought in my friend and excellent industrial designer, Dan Nicholson, during this ideation phase. Dan helped me refine my design intent and was able to beautifully communicate it with pen and paper. By working side-by-side, Dan and I developed the same vision for the F-F-Fiddle. Even though his sketches were relatively rough, we both knew exactly what we wanted to see in the instrument.
3. Design
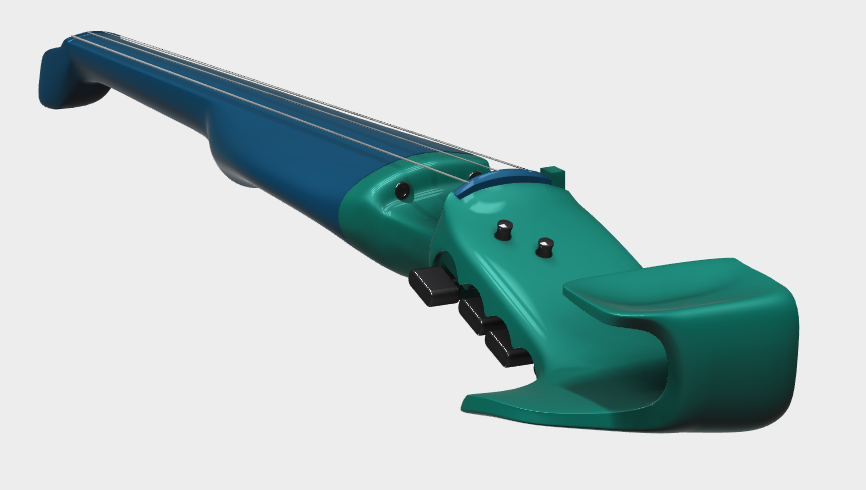
With Dan’s sketches in hand, and a clear vision for the F-F-Fiddle, it was time to make the thing real. This is where the design goes digital. During the computer design phase, I have to make decisions to balance my design intent (my design vision) with the realities of violin ergonomics and my manufacturing method — 3D printing. For an design engineer like myself, these hard decisions mark the beginning of the real challenge (and fun). This process took a couple of weekends, about 30-40 design hours.
4. Prototyping
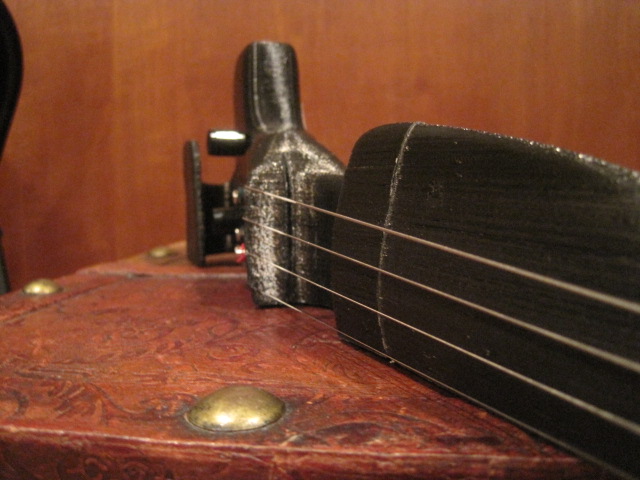
I printed out the first F-F-Fiddle as quickly as possible — there is no better way to learn than by making! Sure enough, it didn’t work — the strings were way too far from the fingerboard, the bridge too flat, and the electronics were terrible. What this first one did do was validate the concept — it help the string tension, and it made noise. I knew at this point that it was possible to 3D print a violin!
5. Iteration
The rest of the process is iteration: perform a redesign based on feedback from the prototype, then make another prototype — repeat. My first order of business was to make a playable instrument, then to make it more durable, and then to continue with improvements for playability and ease of assembly. After another 30-40 hours of work I got to the point where the parts printed reliably and the violin felt more-or-less like a real violin — it was ready to be released to the wild!

A lot of these steps may be familiar to you if you’ve made stuff before. The process used to make things is at the same time both universal and unchanging while it’s also being transformed by advances in digital design tools and 3D printing. No matter what you’re making or how, what’s important is that you work the steps — Research, Ideation, Design, Prototyping, Iteration. Each step is crucial to a successful project, but the real magic happens when they’re combined.